
TL;DR
Microcement creates continuous, thin-layer surfaces that remove joints and visual breaks, delivering a waterproof, minimalist bathroom with fast install times and low surface buildup. Correct substrate preparation, membrane strategy, and finishing polish separate durable installations from failures.
Introduction
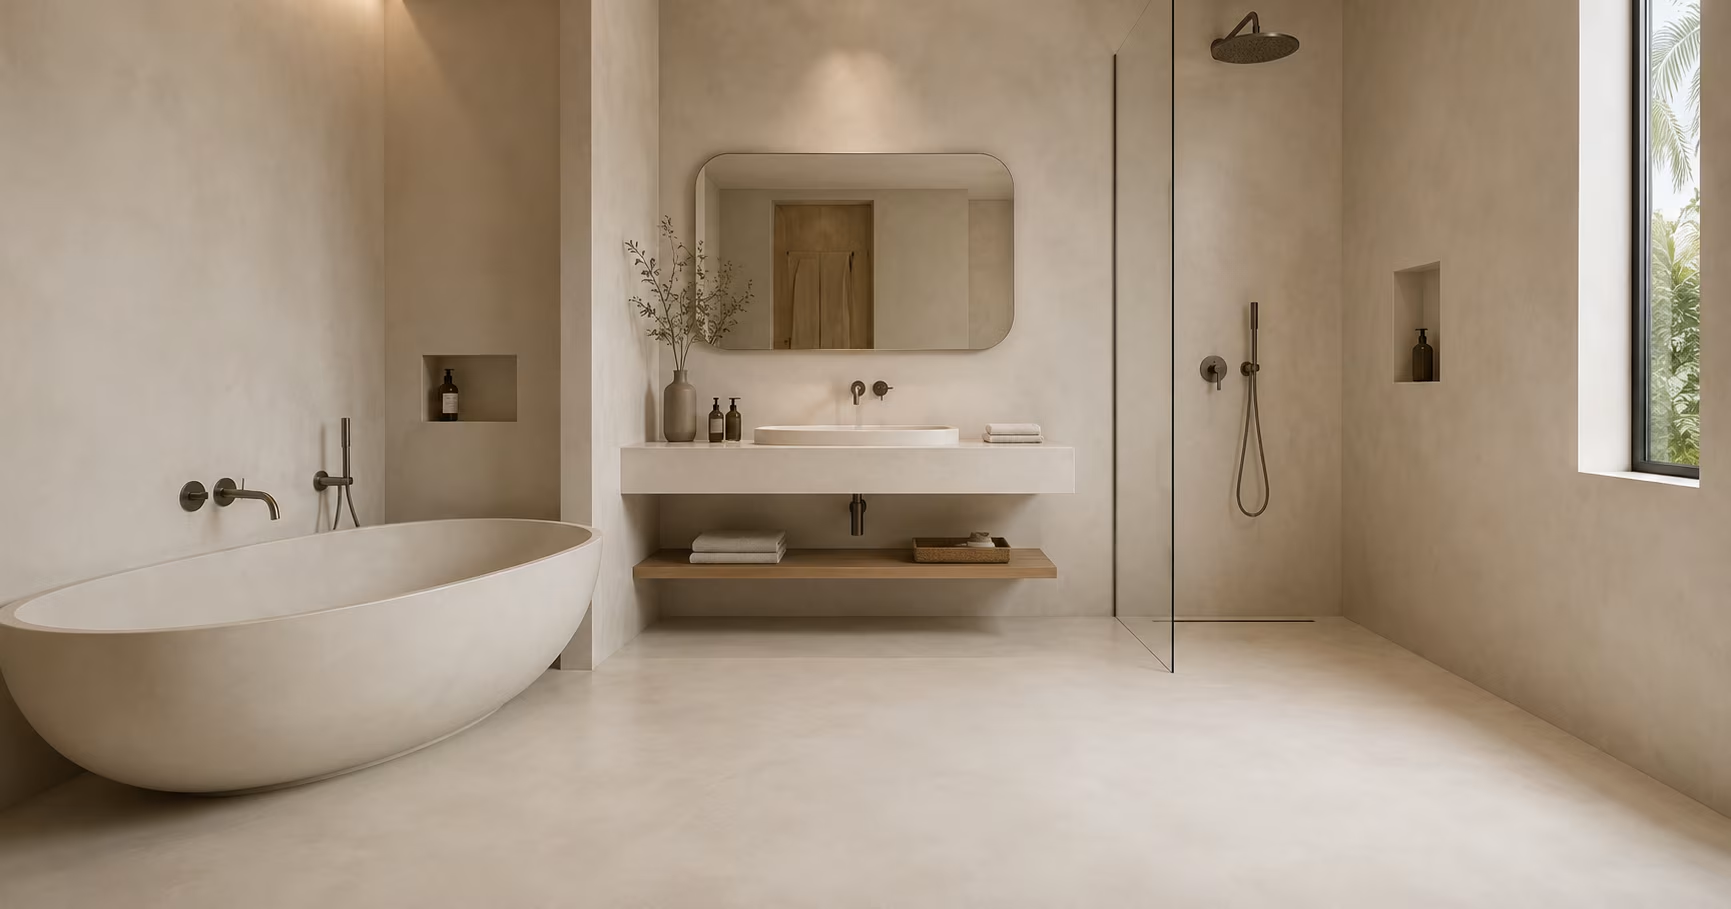
What does a bathroom look like when the floor, wall, and shower read as one plane? Microcement does that by turning fragmented surfaces into a unified field. This article explains why designers, contractors, and specifiers choose microcement for minimalist bathrooms, the technical steps that matter, common errors I’ve fixed on real projects, and how to judge long-term performance. Expect concrete trade-offs and implementable guidance.
Why microcement reads as a single surface
Microcement is a cement-based fine-coat system applied in thin layers, typically 2–3 millimeters total, that bonds to tiles, concrete, or cement board. Because it cures as a continuous layer, it removes grout lines and tile edges that interrupt light and sightlines. The surface can be tuned matte, satin, or high polish so texture and reflectivity support a minimalist aesthetic without adding weight or thickness.
The structural reason for its seamless look is simple: the material is trowel-applied and sanded to a continuous plane. That continuity matters for maintenance and design coherence. In practice, I’ve put microcement over 20-year-old terrazzo and over recent backerboard; both took the finish but asked for different bonding and crack-control strategies.
What substrates demand before product touches the wall
Substrate prep usually decides success or failure. The surface must be clean, structurally sound, and within acceptable moisture and flatness tolerances. Old ceramic tile often works, but loose tiles, heavy movement joints, or water-damaged gypsum need removal or reinforcement.
On one job in Karachi, a retrofit over glazed tile failed initially because the installer skipped mechanical keying and used only primer. The microcement delaminated along corners. We remedied it by diamond-grinding the tiles for a mechanical bond, adding a flexible uncoupling layer in wet zones, and reapplying microcement in controlled passes.
Waterproofing and movement control for wet zones
Microcement is not intrinsically waterproof; it becomes water-resistant when combined with appropriate membranes and sealers. In showers and wet-room floors, place a polymer-modified waterproof membrane or liquid-applied membrane over the substrate before the microcement base coat.
Movement joints still matter. Microcement systems require soft joints at perimeters and changes of plane to release building movement. I once supervised a high-rise bathroom where the contractor omitted perimeter joints; tiny hairline cracks appeared at the base of the vanity within months. Adding flexible sealant joints and matching microcement fillets corrected the problem.
Layer sequence and why each layer exists
A typical assembly starts with mechanical preparation, primer, then a bonding coat, followed by 2–3 microcement base coats with reinforcement where needed, a fine finishing coat, and finally a protective sealer. Primers control absorption and adhesion, base coats build thickness and cover imperfections, and the finish coat sets texture and color.
Reinforcement mesh is essential where the substrate moves or spans gaps. I use alkali-resistant mesh embedded in the second coat on walls that meet suspended floors. Skipping mesh saves time but frequently appears later as microcracks near corners or around fixtures.
Polishing, sealers, and how sheen affects perception
Sealers do two jobs: they protect the cementitious surface from staining and they adjust sheen. A higher sheen makes a surface read smoother and can amplify small irregularities, while a matte sealer hides surface texture and reads more monolithic. Choose a breathable, UV-stable sealer compatible with the microcement chemistry; solvent-based sealers darken tone more than water-based ones and change the final color.
On a boutique hotel job, the client wanted an industrial grey matte. We tested sealer samples on full-size mockups under the hotel lighting. The satin option looked too glossy under spotlights, so we went matte and used targeted polishing on counters to create contrast without joints.
Color consistency and pigment handling
Pigments are mixed into the microcement base or finish coats and require strict batching control. Small mixes produce noticeable tonal shifts across large walls. Always cast full-size samples and label batch numbers. When repairing or patching, grind back to a stable edge and feather in using the original batch or a carefully matched new batch.
A residential project in Clifton had visible color variance after seasonal humidity changes affected the curing. We corrected that by recoloring the entire bathroom finish coat, then sealing under controlled humidity to lock the tone.
Fixtures, penetrations, and details that kill or make the look
The details separate a professional installation from a DIY finish. Flanges, drains, and plumbing penetrations must be installed so the microcement can bond around a solid edge. Metal thresholds or stainless steel trims that butt into the microcement create deliberate breaks; avoid mismatched trims that interrupt continuity.
I oversaw an installation where the drain flange manufacturer had a unique collar; the contractor trimmed the microcement too close and exposed the substrate. The fix involved replacing the flange with the manufacturer’s recessed model and re-profiling the microcement to a neat, water-tight fillet.
Cleaning and maintenance that preserve the seamless look
Microcement responds well to routine cleaning with pH-neutral cleaners and soft microfiber mops. Abrasive cleaners or acidic products damage sealers and alter sheen. High-traffic bathrooms or rental units benefit from a semi-annual maintenance coat of sealer; this keeps stain resistance and refreshes sheen.
On a gym locker-room project, we scheduled maintenance every six months. That small recurring cost prevented deep reseals and kept the installation looking consistent for three years between major interventions.
Common mistakes and how I fixed them on jobs
Skipping mesh reinforcement on over-tile installations leads to hairline cracks. Remedy: grind, install uncoupling or reinforcement, and reapply base coats. Using the wrong sealer or incompatible primers causes delamination or color shift; remedy: test-site mockups and switch to chemically compatible primers and sealers. Ignoring movement joints causes cracking at terminations; remedy: retrofitting flexible joints and matching fillets.
A memorable failure came from a contractor who sanded aggressively between coats to speed drying. That thinned the system, exposing substrate texture. Recoating with calibrated thickness restored visual continuity and performance.
Performance expectations and longevity
A well-installed microcement bathroom can last a decade or more before major rework, provided movement is managed and sealers are maintained. Expect surface refreshes reapplication of sealer every 3 to 6 years depending on use and UV exposure. Full restoration, including re-feathering and color touch-up, occurs less often but is necessary if damage penetrates the finish coat.
Durability hinges on systems thinking: substrate, membrane, reinforcement, application technique, and aftercare. Weakness in any area shortens life noticeably.
When microcement is not the right choice
Microcement is thin and not a structural repair. It is not appropriate where the substrate lacks rigidity, where continuous heavy impact is likely, or where owners want an inexpensive long-term, zero-maintenance finish. In wet climates with extreme movement, alternative finishes that allow for thicker movement accommodation may be wiser.
I recommended porcelain slab panels instead of microcement for a seaside property with frequent thermal cycling and large panel spans; the client accepted the extra cost for the material stability.
Real project note: Boutique guest suite, Lahore
A boutique guest suite used microcement for floor-to-ceiling shower walls, vanity tops, and tub surrounds to create visual continuity across a tight footprint. The contractor applied a liquid polymer membrane, embedded mesh at all junctions, and performed three finish mockups. The result read like a single stone plane, resisted stains, and shaved three days off the schedule compared with tile work. The lesson: mockups reduce change orders and secure client expectations about texture and sheen.
Real project note: High-rise apartment retrofit, Karachi
A high-rise bathroom retrofit went over existing ceramic tile. The initial installer skipped perimeter joints and used a solvent sealer incompatible with the manufacturer’s primer. Delamination and hairline cracking appeared near the shower curb. We removed the failed sections, installed an elastomeric uncoupling mat, used a cement-compatible primer, and completed the system with AR mesh in corners. The corrected installation has held for four years with routine maintenance.
Cost considerations and labor realities
Microcement materials are not the cheapest per square meter and skilled installers command premium rates because technique matters. Labor is the major cost variable, not materials. Budget realistically for surface preparation, mockups, and maintenance. A rushed skim will show; quality costs more up front but reduces call-backs and long-term remediation.
Hiring installers who can show completed projects, mockup photos, and batch records reduces risk dramatically. When in doubt, ask for a small trial area before committing the full bathroom.
How to specify microcement in project documents
Specify substrate condition tolerances, membrane type, reinforcement mesh locations, number and thickness of coats, sealer type and sheen, movement joint locations, and maintenance intervals. Include mockup approval and batch records as contractor deliverables. Require a manufacturer-approved installer for warranty coverage.
I include a one-page acceptance checklist in project closeout that covers visual, adhesion, and seam checks. That short document prevents disagreements later.
Assessing environmental and health considerations
Microcement uses cementitious binders and polymers that have volatile organic compound profiles depending on primers and sealers. Choose water-based, low-VOC options where indoor air quality matters. Dust control during grinding and sanding is crucial use HEPA vacuums and PPE to limit silica exposure.
On hospital projects, the specification required a documented low-VOC pathway and on-site air monitoring during installation due to sensitive occupants.
Visual strategies for minimalist impact
Minimalist bathrooms benefit from subtle variations: a satin floor against a matte wall, a polished vanity top inset, or a soft gradation of tone across a shower curb. Use full-scale mockups to confirm how light interacts with texture and color. Small intentional contrasts maintain the seamless feeling while providing touchpoints for the eye.
A designer I worked with used a barely darker microcement on the shower pan to anchor the space visually while keeping the walls continuous, which read as deliberate rather than patchwork.
Wrap Up
Microcement delivers the seamless, minimalist surfaces many designers want, but it demands discipline: substrate control, proper membranes, reinforcement, consistent batching, and ongoing maintenance. Success comes from treating the finish as a system rather than a cosmetic skim. With careful mockups and experienced applicators, microcement can produce durable, elegant bathrooms that read as a single plane.
FAQs Section
What is the typical thickness of a microcement bathroom system?
A full microcement assembly is usually 2–3 millimeters thick across base and finish coats, with additional membrane or reinforcement layers where required.
Can microcement be applied directly over old ceramic tiles?
Yes, but only when tiles are sound and properly prepared. Mechanical keying, compatible primers, and mesh reinforcement at movement points are essential to prevent delamination.
How often should a microcement bathroom be resealed?
Light-use residential bathrooms often need resealing every 3–6 years. High-traffic or commercial bathrooms typically require semi-annual inspections and more frequent maintenance coats.
Disclaimer
This content shared by Fall Rugs is solely for research and informational purposes. Fall Rugs is not a professional interior design or home renovation consultancy, and the information provided should not be considered professional advice for home improvement or decor. All ideas and suggestions are based on current trends and general knowledge in the home decor industry.