
TL;DR
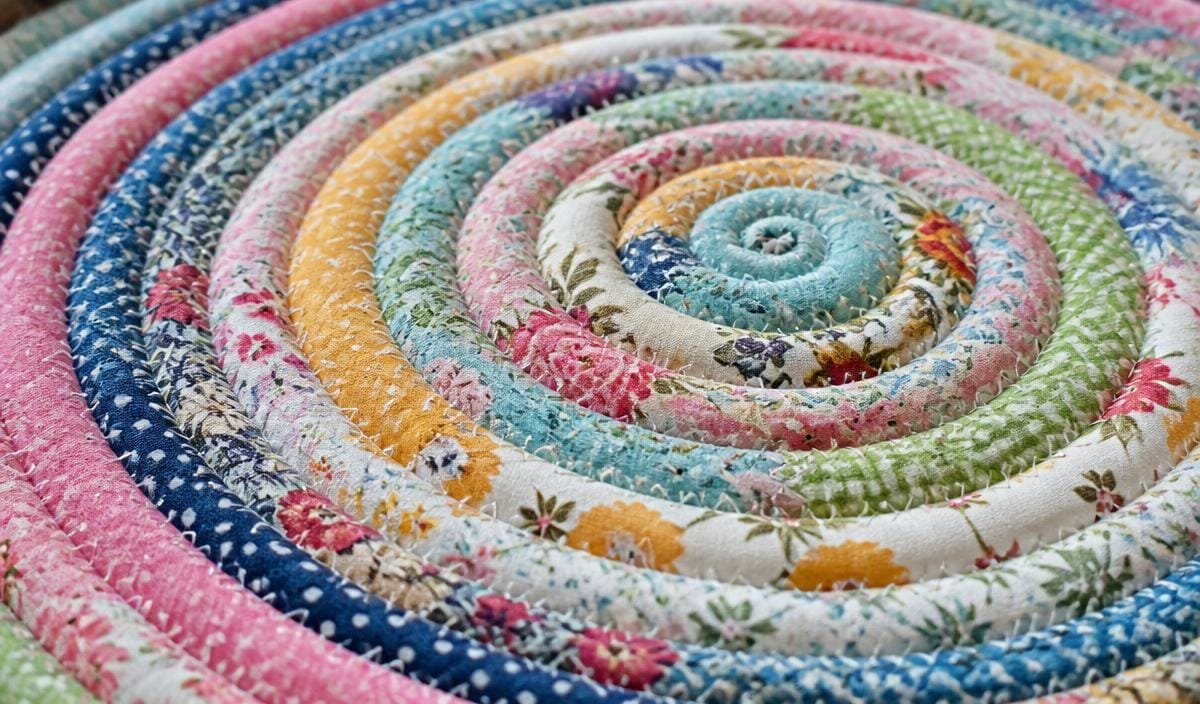
Jelly roll rugs require sewing pre-cut cotton fabric strips over batting into tubes, then zigzag stitching them together. Success depends on maintaining consistent tension to prevent the rug from cupping or warping. Proper pressing with a heavy iron keeps the final piece flat and functional.
Introduction
Why do so many sewing enthusiasts struggle to keep their handmade floor coverings completely flat? Creating a custom accent piece using colorful fabric strips offers an exceptional way to personalize a living space. This project requires patience, specific machine settings, and the right materials to achieve a professional finish. You will learn the exact steps to build a sturdy rug that withstands foot traffic and machine washing.
Selecting Materials And Tools For Longevity
Choosing the right ingredients determines whether a rug lasts for years or falls apart during the first wash cycle. A standard jelly roll contains forty strips of fabric measuring two and a half inches wide by forty-four inches long. Renowned brands like Moda Fabrics or Robert Kaufman offer coordinated bundles that eliminate the need for hours of color coordination and manual cutting.
Using the correct internal padding provides the necessary structural integrity for the project. Two rolls of two-and-a-half-inch wide 100% cotton batting, such as Bosal Katahdin or Hobbs Heirloom, fit the fabric strips perfectly. Cotton thread is preferable, and a large spool of 50-weight Aurifil thread ensures that seams remain secure without adding unneeded bulk inside the tubes.
- Fabric selection: One standard jelly roll containing forty pre-cut strips of high-quality quilting cotton.
- Batting rolls: Approximately fifty yards of pre-cut cotton batting strips to fill the fabric tubes evenly.
- Sewing machine needles: Heavy-duty needles, specifically Jeans or Denim size 90/14, to handle dense layers.
- Specialized notions: A sewing clip set and a dedicated tube-folding tool to speed up the pre-assembly phase.
During a spring sewing retreat in Ohio, a quilter named Sarah tried using synthetic polyester batting scraps instead of specialized cotton rolls. The slippery polyester lacked the natural grip needed to stay stable under the presser foot, resulting in a distorted oval that refused to lie flat on the floor. Purchasing dedicated cotton batting prevents this specific frustration entirely.
Preparing And Folding The Fabric Tubes
Building the foundation of a beautiful rug involves creating uniform tubes before assembling the main body of the project. Sew all forty fabric strips together end-to-end using diagonal forty-five-degree mitered seams to distribute the fabric bulk evenly. Trim the resulting seam allowances to a quarter-inch and press them open using a hot iron with no steam.
Place the batting strip directly onto the wrong side of the connected fabric strip, then fold the raw edges inward so they meet precisely in the middle. Fold the entire strip in half once more to enclose the raw edges completely, securing the sandwich with clips every few inches. Stitch down the open edge using a standard straight stitch to create one continuous length of filled tubing.
- Align the batting precisely in the center of the fabric strip to prevent thin spots along the edges.
- Maintain a consistent quarter-inch distance from the open edge when applying the initial straight stitch.
- Wind at least three or four bobbins before starting this process to maintain a steady workflow.
Experienced makers at local quilting guilds recommend letting the sewing machine feed dogs pull the layers naturally through the machine. Pulling or stretching the fabric during this step introduces hidden tension that causes severe twisting later. A crafter who forces the fabric through the machine will find the tube curling tightly like a vine, making the next steps difficult.
Assembling The Center Oval And Managing Tension
The construction of the floor mat happens when you begin coiling the long tube into an oval shape on your workspace. Start by folding the end of the tube back on itself by about two and a half inches to form the center core. Set your machine to a wide zigzag stitch, adjusting the width to 5mm and the length to 3mm to bridge the gap between the tubes.
Guide the adjacent tubes under the presser foot so the needle catches both sides of the fabric evenly. Keep your hands flat on the sewing table, guiding the expanding oval gently without lifting, twisting, or pulling the piece. The physical weight of the project increases quickly, requiring careful physical support during assembly.
- Position an extension table next to the machine to keep the heavy weight of the rug level with the needle.
- Guide the fabric tubes together join-to-join without overlapping the edges under the presser foot.
- Reduce the presser foot pressure slightly if the machine struggles to advance the double-thickness of tubing.
An interior decorator in Seattle wanted a custom entryway piece to complement her West Elm furniture setup. Her first attempt curved upward like a shallow salad bowl because she held the growing rug in her lap while stitching the outer rows. Once she used a large folding table to support the entire weight of the textile, the tension balanced out perfectly.
Correcting The Common Bowl Effect And Pressing Secrets
If your project begins to resemble a basket instead of a flat mat, you must intervene with correcting techniques immediately. The bowl effect occurs when the outer fabric strips are sewn with tighter tension than the inner coils. Ironing the piece at strategic intervals during construction helps counteract this natural physical tendency.
Set your iron to the highest cotton setting with full steam capacity, pressing down firmly rather than sliding the iron across the fabric. Let the cotton fibers cool completely before moving the piece back to the sewing machine extension table. Physical cooling locks the fibers into their flat shape permanently.
- Press the rug flat after adding every three rows to check for early signs of edge curling.
- Apply a light mist of Mary Ellen Best Press starch to stubborn areas before applying the iron.
- Unpick the last two rows if the cupping exceeds one inch, as steam cannot fix severe mechanical tension errors.
A workshop leader recently demonstrated this fix on a large five-foot oval mat meant to match a Pottery Barn living room layout. By applying heavy steam and placing flat acrylic quilting rulers weighted with heavy books on the warm fabric, the fibers relaxed into a flat state. This pressing routine saves hours of unpicking later.
Finishing The Outer Edge And Long-Term Care
Securing the final tail of the fabric tube prevents fraying and ensures the finished mat handles daily foot traffic safely. Tuck the raw end of the final strip underneath the preceding row, tapering the cut with shears to minimize the final bulk. Sew over this junction multiple times using a tight zigzag stitch or a dense satin stitch for security.
For long-term maintenance, these solid cotton rugs can go directly into a standard washing machine on a gentle cycle with cold water. Avoid using harsh chemical detergents or optical brighteners that could fade the vibrant textile dyes over time.
- Air dry the mat flat on a clean surface instead of utilizing a high-heat clothes dryer.
- Position a non-slip rug pad underneath the finished piece to prevent sliding on slick hardwood or tile floors.
- Trim any tiny loose threads that emerge after laundering with sharp embroidery scissors instead of pulling them.
Homeowners often place these colorful mats in high-use areas like kitchens or bathrooms where spills occur frequently. A busy family in Chicago reported that their handmade mat outlasted two cheaper commercial options from IKEA because the thick cotton construction absorbed moisture efficiently and cleaned up perfectly in the wash.
Wrap Up
Making a jelly roll rug is a rewarding project that turns simple fabric strips into a functional heirloom. Choosing quality cotton batting, managing sewing machine tension, and pressing frequently ensure a flat finish. Take your time during the assembly process to create a custom piece that brings warmth to your home.
FAQs Section
What size sewing machine needle is best for a jelly roll rug?
A size 90/14 Jeans or Denim needle works best because it easily pierces through the multiple thick layers of fabric and cotton batting.
How do I stop my jelly roll rug from curling up into a bowl?
Keep the entire weight of the rug supported on a flat table level with your sewing machine, and avoid pulling or stretching the fabric tubes as you stitch them together.
Can you wash a homemade jelly roll rug in a washing machine?
Yes, you can wash these rugs in cold water on a gentle cycle, but they should be laid flat to dry to maintain their original shape.