
Here are the 5 easiest ways to fix a leaking shower head, starting with the simplest fixes and moving toward slightly deeper tweaks.
Quick Diagnosis: If water drips from the joint or connection while the shower is on, focus on Fixes 1–4. If the shower head drips constantly even when the shower is turned off, jump straight to Fix #5.
1. Soak in Vinegar (Clear Mineral Buildup)
- The Problem: Mineral deposits (limescale) clog the tiny spray nozzles, forcing water out of the neck seal or causing uneven dripping long after you turn the water off.
- The Fix: Fill a plastic bag half-full with white vinegar, submerge the shower head in it, and secure it around the pipe with a rubber band. Let it soak for 2 to 3 hours (or overnight for heavy buildup). Remove the bag, scrub the nozzles with an old toothbrush, and run hot water to flush out loosened debris.
2. Wrap Threads with Teflon Tape
- The Problem: Old, worn-out plumber’s tape around the pipe threads allows water to seep through the connection joint.
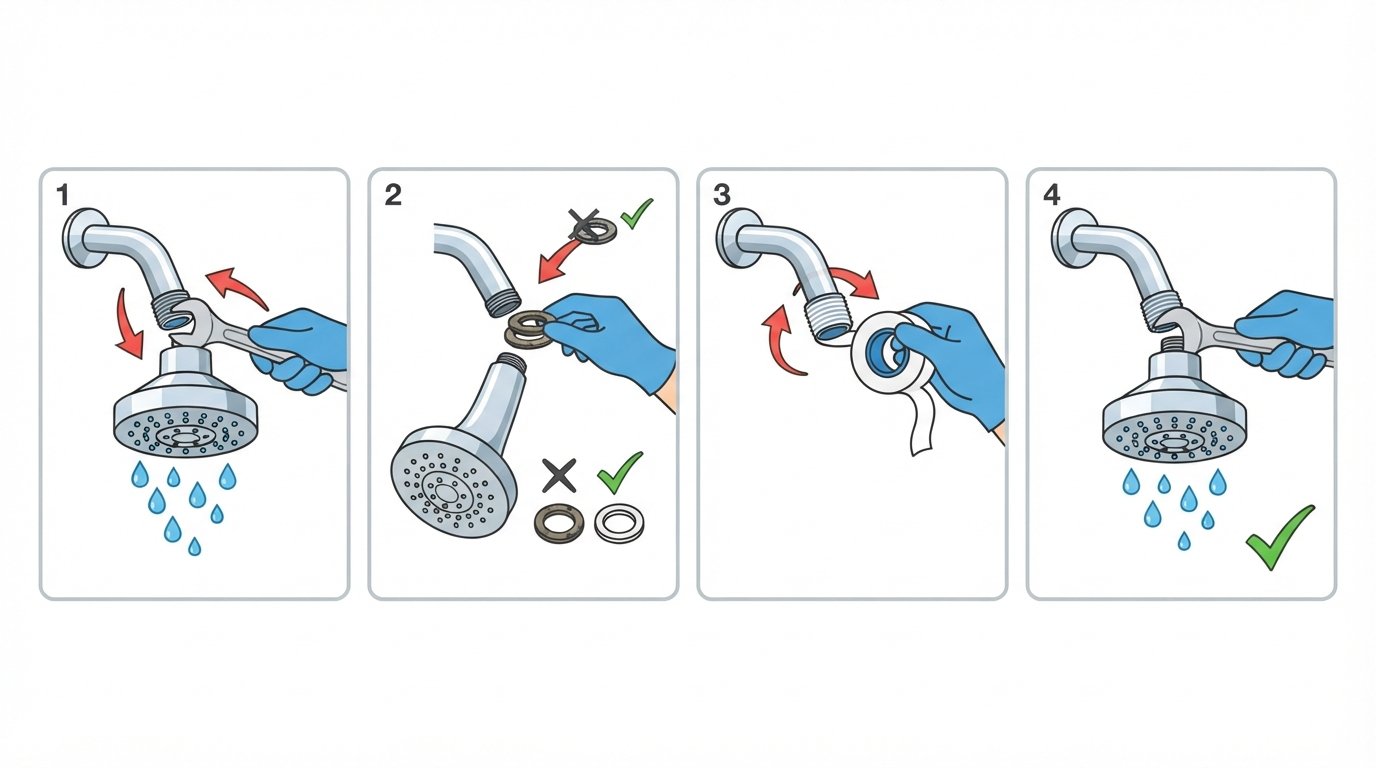
- The Fix: Unscrew the shower head counterclockwise (wrap a rag around the nut and use an adjustable wrench if it’s stubborn). Clean off any old tape or debris from the pipe threads. Wrap 3 to 5 turns of Teflon tape clockwise around the pipe threads, then screw the shower head back on hand-tight plus a quarter-turn with a wrench.
3. Replace the Rubber Washer or O-Ring
- The Problem: Inside the connection collar sits a small rubber washer or O-ring. Over time, heat and water pressure cause the rubber to dry out, crack, or flatten.
- The Fix: Unscrew the shower head and look inside the neck joint. Use a flathead screwdriver or tweezers to pop out the old rubber ring. Take it to a local hardware store to match the exact size, press the new washer firmly into place, and reattach the shower head.
4. Tighten the Connection & Swivel Joint
- The Problem: Daily adjusting and water pressure vibrations can gradually loosen the shower head collar or swivel ball joint.
- The Fix: Wrap a towel around the connecting nut to protect the finish, and use an adjustable wrench or slip-joint pliers to give it a gentle clockwise tighten. Caution: Don’t overtighten, especially if the fixture has plastic internal threads, as this can crack the housing.
5. Replace the Shower Valve Cartridge (For “Off” Dripping)
- The Problem: If water continuously drips from the nozzles long after the shower is turned off, the issue isn’t the head—it’s the internal valve inside your wall handle letting water leak through.
- The Fix: Shut off your home’s main water supply. Remove the shower handle cap, unscrew the handle, and pull off the metal faceplate. Pull out the worn valve cartridge using pliers or a cartridge puller tool, take it to the store to get an exact match, and slide the new one in.