
TL;DR
Blackout curtains need dense lining, accurate measurements, generous window coverage, and neat hems. Most light leaks come from the top and sides, so correct rod placement matters as much as the fabric.
Introduction
Why do some blackout curtains still leave a bright frame around the window? The fabric may block light, but poor width, short hems, and narrow curtain rods let sunlight enter around it. Learning how to make blackout curtains gives you control over the size, colour, hanging style, and darkness level. The process requires careful measuring, basic sewing skills, and the right combination of face fabric and coated lining.
Choose Fabric That Blocks Light Without Hanging Stiffly
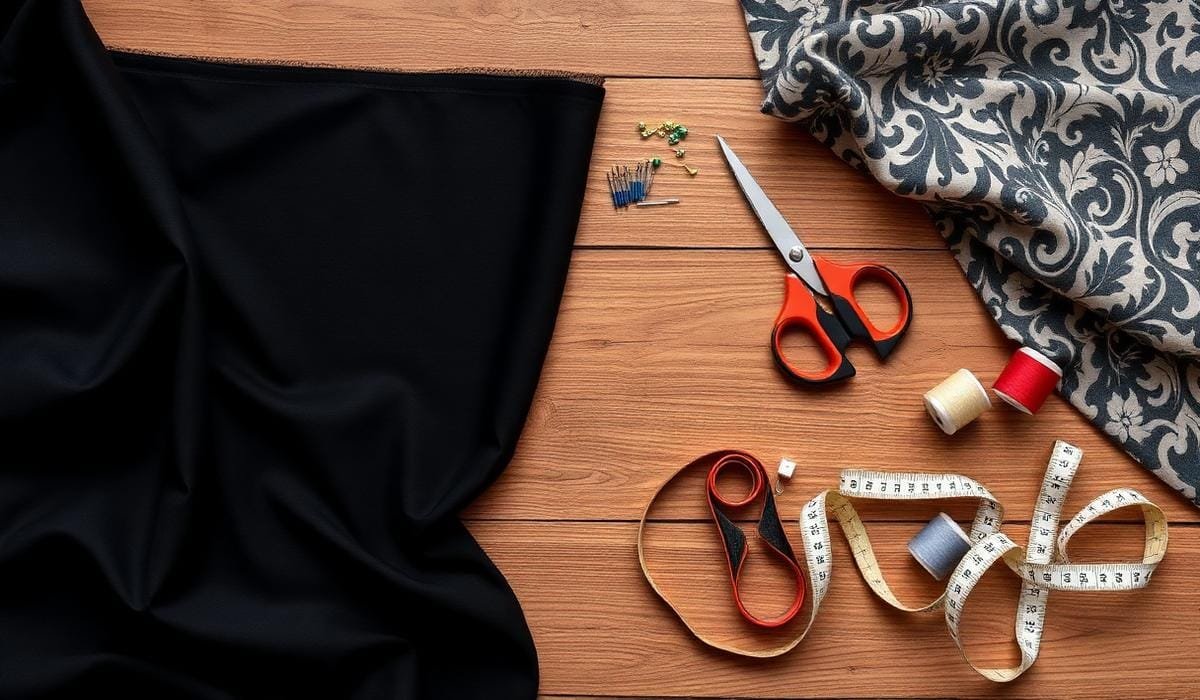
A blackout curtain usually contains two materials. The face fabric provides colour and texture, while a coated lining stops light. Cotton, linen blends, velvet, polyester, and decorator fabric all work as outer layers. Thin quilting cotton can work too, but it needs a stable lining because it lacks the weight required for long, smooth folds.
Blackout lining often comes in one-pass, two-pass, or three-pass versions. Each “pass” refers to a layer of foam coating added during production. Three-pass lining usually blocks more light and gives the curtain extra body. Products from Roc-lon and Hanes Fabrics appear in many upholstery shops, while IKEA sells ready-made blackout models such as MAJGULL for useful construction reference.
- Hold a fabric sample against a sunny window before buying several metres.
- Select washable materials for children’s rooms, kitchens, or rental properties.
- Avoid mixing a washable face fabric with dry-clean-only lining.
- Choose white or pale lining when the window receives strong afternoon sun.
- Test patterned fabric for vertical alignment before cutting both panels.
Black velvet can produce deep darkness, yet it may feel too heavy for a small rod. Linen looks relaxed, but loose weaves allow pinpoints of light unless the lining covers every section. For a balanced bedroom curtain, a medium-weight cotton blend paired with three-pass blackout lining offers clean folds without placing excessive strain on brackets.
Measure the Window, Rod, and Finished Drop
Measure the curtain rod rather than the glass alone. A curtain that matches the window width will flatten when closed and leave gaps at both edges. Most curtains need a combined finished width between 1.5 and 2 times the rod width. A 60-inch rod, for instance, usually needs 90 to 120 inches of finished curtain width.
Rod position changes the result. Mounting the brackets around 6 to 10 inches above the frame reduces light at the top. Extending the rod 4 to 8 inches beyond each side gives the panels enough space to overlap the wall. Designer Emily Henderson often uses wide, high curtain placement to create the look of a larger window as well as fuller fabric coverage.
- Measure the rod from one end to the other, excluding decorative finials.
- Divide the total curtain width evenly between two panels.
- Add side hem, centre overlap, header, and bottom hem allowances.
- Measure from the rod or ring to the chosen finishing point.
- Leave about half an inch above the floor for curtains that open daily.
A night-shift nurse in Phoenix may need stronger coverage than someone decorating a low-light room in Manchester. For the Phoenix bedroom, a wall-mounted rod extending well beyond the frame, floor-length panels, and a return at each bracket can control intense morning sun. The same construction also reduces glare on screens and improves daytime sleep conditions.
Calculate Yardage Before Cutting
Fabric width determines how many vertical lengths each panel needs. Home-decor fabric often measures about 54 inches wide, while some blackout lining comes in widths near 54 or 60 inches. A wide window may require two fabric widths joined for each panel. Add enough yardage for pattern matching when working with checks, stripes, or large floral repeats.
For two finished panels measuring roughly 50 by 84 inches, a project may require about six yards of face fabric and six yards of lining. At an estimated $10 per yard for the face fabric and $8 per yard for lining, the main materials would cost about $108. Premium velvet, embroidered fabric, or Pottery Barn-style linen can raise that figure considerably.
- Add the header depth to the required finished length.
- Add a double bottom hem of 3 to 4 inches.
- Include at least 1 inch per side for side hems.
- Allow extra fabric for shrinkage and pattern placement.
- Buy all fabric from one dye lot when colour consistency matters.
Cutting directly after purchase often causes problems. Wash and dry washable fabric first because cotton and linen blends can shrink. Press each length before measuring, then place it on a large table or clean floor. A Fiskars rotary cutter, quilting ruler, and self-healing mat can improve accuracy, though sharp dressmaking scissors also work well.
Cut and Join the Curtain Layers
Start by squaring the fabric. Factory-cut edges are not always straight, so use the selvage as a reference and check each corner with a large ruler. Cut matching face-fabric panels first, then cut the blackout lining slightly narrower and shorter. The smaller lining stays hidden behind the face fabric after the side and bottom hems are folded.
Join multiple widths with a straight seam and a seam allowance of about half an inch. Place joined seams toward the outer side of each curtain rather than the centre opening. Press face-fabric seams with an iron. Treat coated lining more carefully because direct high heat can soften, mark, or damage the foam layer.
- Use fabric clips instead of many pins on coated blackout lining.
- Fit a size 90/14 universal needle for medium-weight curtain fabric.
- Sew with polyester thread such as Gütermann Sew-All.
- Use a longer stitch, near 3 millimetres, for thick layered sections.
- Support heavy fabric beside the machine so it doesn’t pull the seam.
A Singer Heavy Duty 4452 can handle common curtain fabrics, but even a basic domestic machine can sew blackout panels when the layers move freely. Problems often start when several yards of material hang from the table. The weight drags the seam sideways, creating puckers. A chair or folding table placed beside the machine can carry the excess fabric.
A No-Sew Option for Light-Duty Rooms
Fusible web tape can join side hems and attach a header without a sewing machine. Brands such as Dritz and HeatnBond sell iron-on products in several widths. This method suits guest rooms or temporary rental projects, but it may fail under heavy velvet or repeated washing. Test a small lining scrap first because some foam coatings react poorly to heat.
Sew Side Hems, Bottom Hems, and the Header
Place the face fabric right side down and centre the lining on top. Fold the face-fabric edges over the lining, then fold them again to hide the raw edge. Stitch close to the inner fold. This enclosed side hem holds the lining in place and creates a clean border when viewed from outside the house.
Use a deep bottom hem to give the curtain weight. A double 4-inch hem works well for many floor-length panels. The lining can end above the face-fabric hem, which prevents a bulky stack of coated material at the bottom. Slip-stitching the lower corners by hand gives a softer finish, while machine stitching provides greater strength for frequently used curtains.
- Press each fold before sewing rather than shaping it at the machine.
- Check both panels against each other before finishing the bottom hems.
- Add drapery weights inside the lower corners when panels flare outward.
- Leave the lining loose at the bottom if the fabrics may shrink differently.
- Backstitch at stress points near the header and opening edges.
Choose the header according to the rod and room style. Rod pockets look casual but can leak light along the top. Curtain tape creates regular pleats and works with hooks or rings. Metal grommets look modern, though the holes expose small sections near the rod. Clip rings are fast to install, while back tabs create broad, relaxed folds similar to many West Elm curtains.
Mount the Curtains to Control Edge Leaks
A well-sewn panel can still fail when the hardware sits too close to the frame. Check the brackets with a spirit level and use wall anchors suited to plasterboard, brick, concrete, or timber studs. Heavy lined curtains need firm support. Thin plastic anchors may loosen when people pull the panels open several times each day.
Light often enters where the curtain meets the wall. A wraparound rod curves toward the wall and closes this gap. Brands such as Umbra sell curved and room-darkening rods in several sizes. A central overlap, magnetic edge strips, or small hook-and-loop tabs can reduce the bright line between two panels without changing the visible front.
- Extend the rod beyond both sides of the window frame.
- Position the curtain close to the ceiling when top light remains visible.
- Let the panels overlap by 2 to 4 inches at the centre.
- Add a pelmet or fabric-covered cornice above problem windows.
- Use side channels only where near-total darkness is required.
In a child’s nursery in London, two attractive blackout panels still allowed early summer light through the upper corners. Raising the rod and replacing straight brackets with a curved return rod solved most of the issue. The family kept the original curtains and changed only the mounting system, showing why hardware deserves attention before fabric gets replaced.
Test the Curtains and Correct Common Problems
Test the room during the brightest part of the day. Close the door, allow your eyes to adjust, and inspect the window from several angles. Pinholes through the fabric usually point to coating damage or open seams. Broad glowing areas suggest weak lining, while bright borders show that the panels or rod don’t cover enough wall.
Wrinkles often disappear after the curtains hang for a few days. A garment steamer can relax the face fabric, but keep steam away from coated lining unless its care label permits it. Never place curtains against portable heaters, radiators, open flames, or hot lamps. Blackout materials vary, and ordinary home curtain fabric is not automatically flame resistant.
- Add a separate blackout liner when the face panels are already finished.
- Sew a narrow fabric strip behind the centre opening to cover the join.
- Move brackets outward when light enters from the sides.
- Add weights when the lower corners curl toward the room.
- Replace damaged lining rather than painting or coating the fabric at home.
Uneven hems often come from measuring on a table rather than after hanging. Suspend unfinished panels for a day, then mark the final length from the floor. Floors and ceilings can slope, especially in older houses. Adjusting each panel in its actual position creates a straighter visual line than relying on one repeated measurement.
Wrap Up
Good blackout curtains rely on accurate width, coated lining, deep hems, and hardware that covers the whole opening. Fabric alone cannot stop light entering above, below, or beside the panels. Test the window during direct sunlight before changing the construction. A small adjustment to rod height, overlap, or side coverage may darken the room more than replacing the entire curtain.
FAQs Section
Can I turn regular curtains into blackout curtains?
Yes. Attach a separate blackout liner with curtain hooks, sewing, snap tape, or hook-and-loop strips. The liner needs to cover the full back of each panel without pulling the face fabric out of shape.
What fabric works well for homemade blackout curtains?
Medium-weight cotton, polyester, velvet, and linen blends work well as face fabrics when paired with coated blackout lining. Three-pass lining usually gives stronger light control than thin, uncoated fabric.
Do blackout curtains need to touch the floor?
They don’t have to touch it, but floor-length panels reduce light entering at the bottom. For curtains opened daily, leave roughly half an inch of clearance to prevent dragging and dirt buildup.