
TL;DR
Transforming a room requires thoughtful color choices and precise geometric patterns. Using high-quality painters tape and strategic color blocking turns flat surfaces into dynamic focal points. This guide outlines practical steps, material choices, and layout strategies to achieve professional results.
Introduction
Does your living room feel flat or uninspired despite having quality furniture? Standard accent walls often fall short of creating a truly memorable architectural impact. By introducing structured lines and deliberate color combinations, you can redefine the perceived dimensions of any room. You will learn how to plan, tape, and execute striking visual patterns that elevate your interior design.
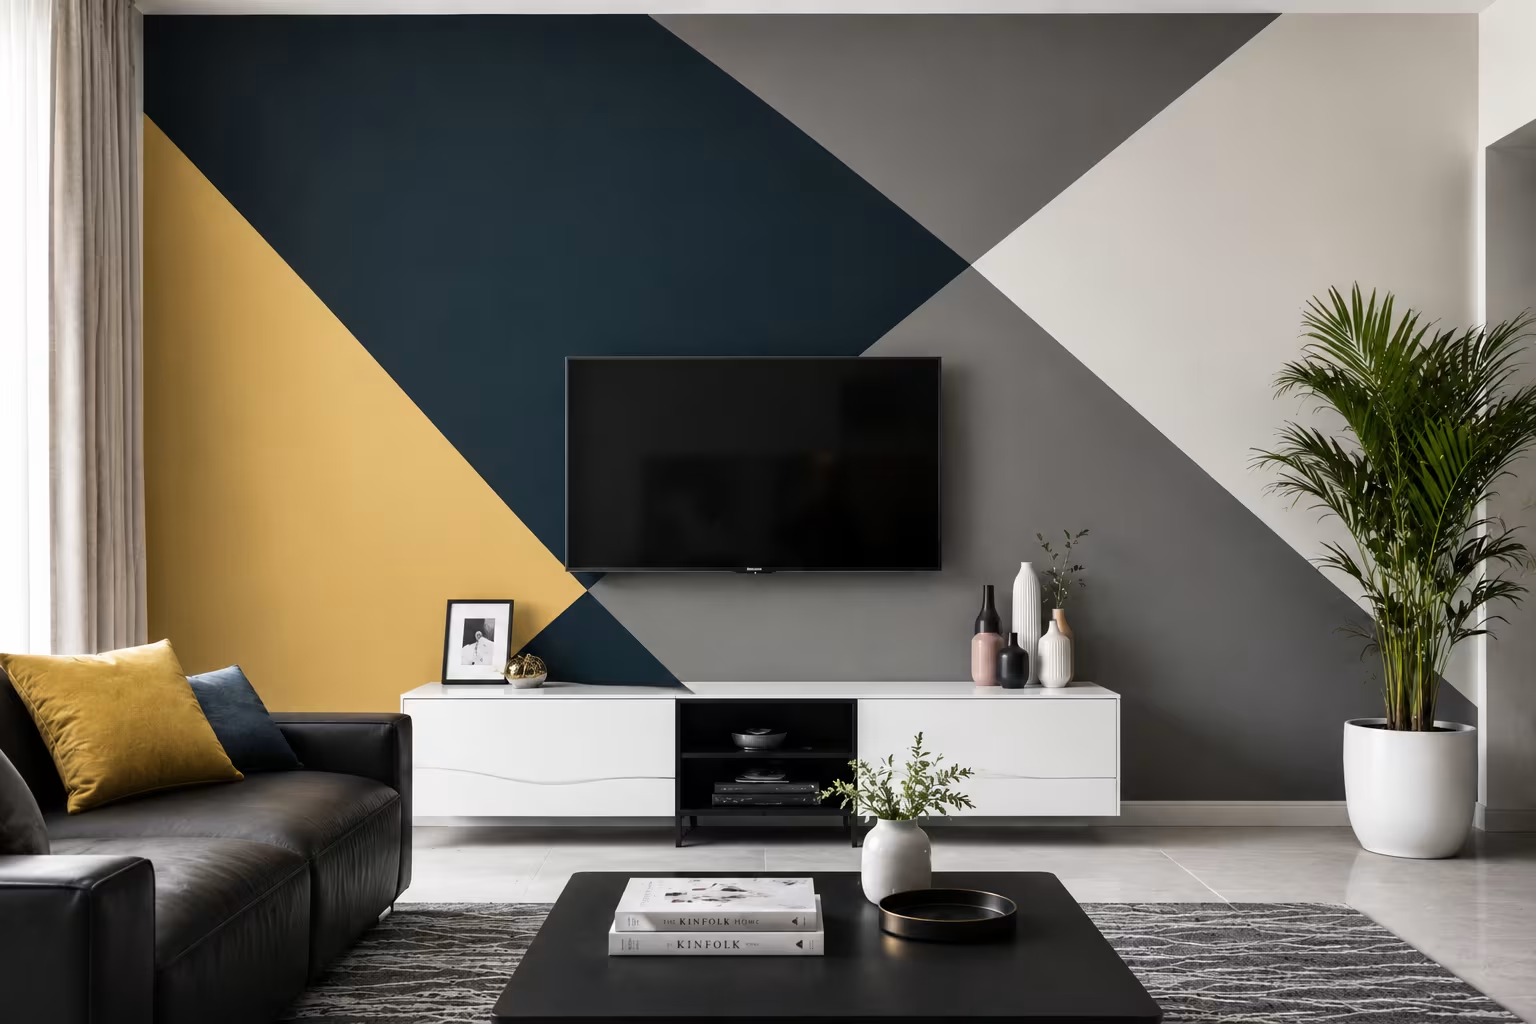
1 Three Color Chevron Patterns for Living Rooms
The classic chevron layout introduces a sense of continuous movement across wide surfaces. Unlike standard zig-zag patterns, a bold chevron uses three distinct tones to create a sense of depth. Interior designer Emily Henderson often recommends utilizing a neutral base, a mid-tone transition shade, and a deep anchor color to make the pattern feel deliberate rather than chaotic.
When planning a chevron wall in a standard twelve-by-fifteen living room, scale is your most important factor. Small, tight peaks can cause visual fatigue and make a room feel cluttered. Opt for large scale peaks that measure at least twenty-four inches from valley to crest. This ensures the design acts as an architectural feature rather than a distracting backdrop.
- Select three graduating tones from the same color family to ensure natural visual harmony.
- Measure and mark your peak points with a laser level before applying any tape to the surface.
- Seal the edges of your tape with your base coat color to prevent the darker tones from bleeding underneath.
A recent project in a Chicago townhome utilized Benjamin Moore Simply White as the foundational base. The design team mapped out thirty-inch wide chevrons across the main television wall. They filled the alternating bands with Hale Navy and Coventry Gray. The result turned a plain drywall surface into a structured focal point that perfectly framed a West Elm media console.
2 Asymmetric Triangles for Small Home Offices
Small workspaces often suffer from a lack of visual interest, making them feel cramped or clinical. Asymmetric triangles break up the rigid boxy feel of standard square rooms by pulling the eye upward toward the ceiling line. Using sharp diagonals creates an optical illusion that makes low ceilings appear much higher than they actually are.
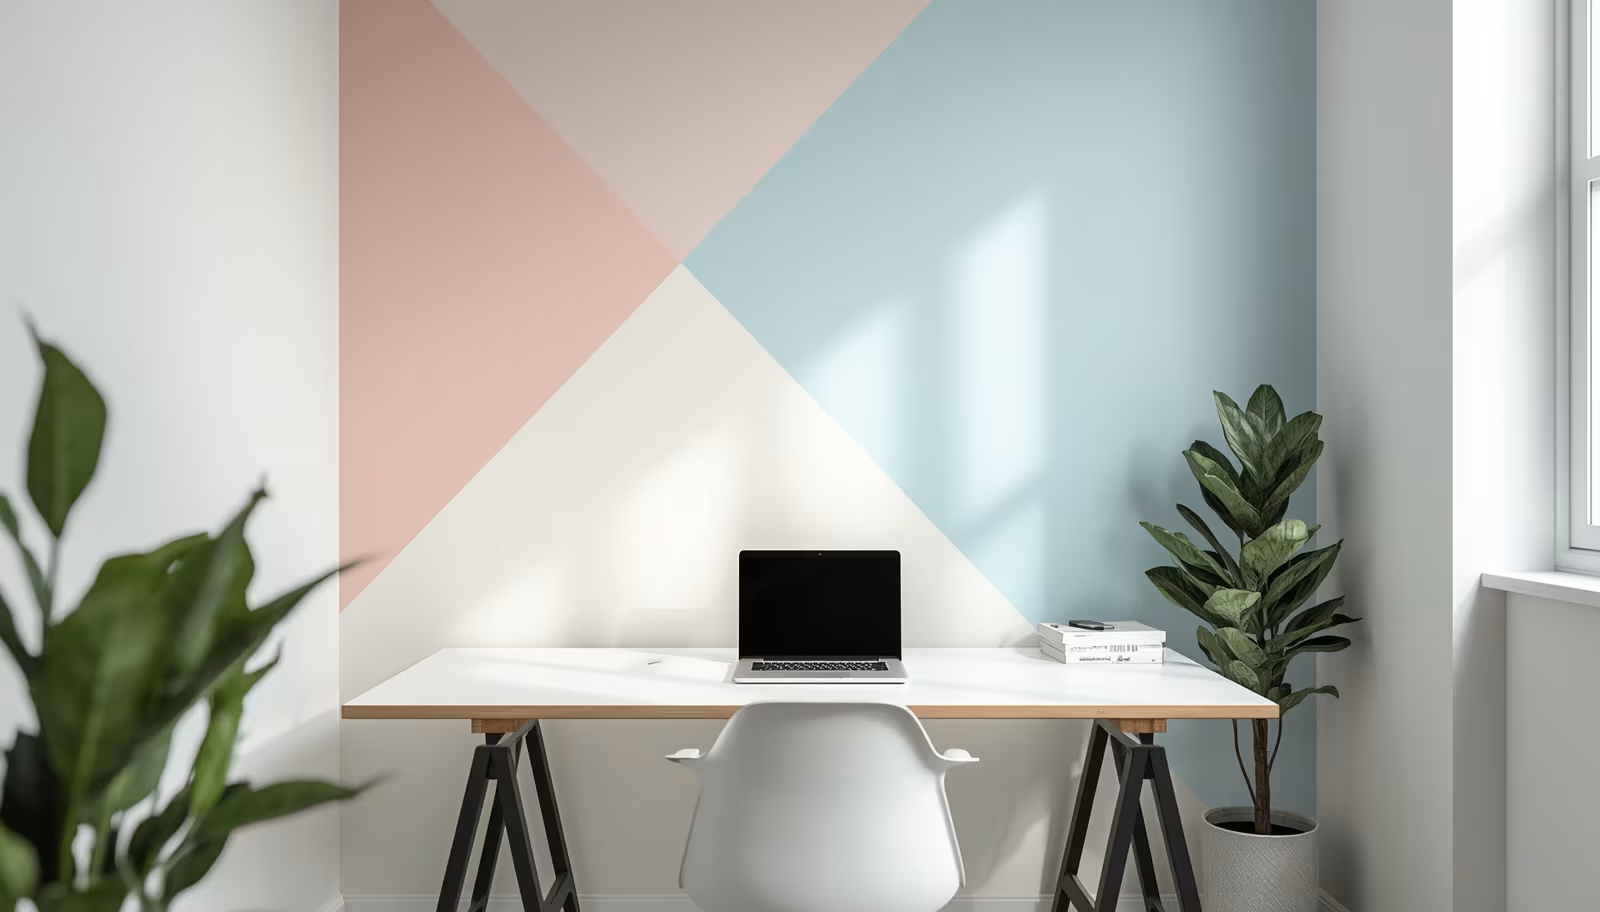
Achieving success with this layout requires working with the existing light sources in your room. Position the largest, darkest triangle on the wall section that receives the most natural sunlight during your working hours. This prevents the bold hue from overwhelming the space or creating unwanted glare on your computer screen.
- Incorporate contrasting tones like terracotta and soft sage against a muted cream backdrop.
- Run your primary diagonal line from the bottom left corner completely to the top right ceiling edge.
- Keep your furniture minimal in front of the wall to let the geometric shapes remain visible.
An office renovation in Austin, Texas featured this exact approach to fix a dark basement workspace. The homeowner used Sherwin-Williams Tricorn Black for a single dramatic triangle that intersected with pieces of standard painter tape. They balanced the dark shape with soft blocks of Alabaster and Warm Terracotta. The dramatic lines instantly gave a cheap IKEA Linnmon desk an upscale, custom appearance.
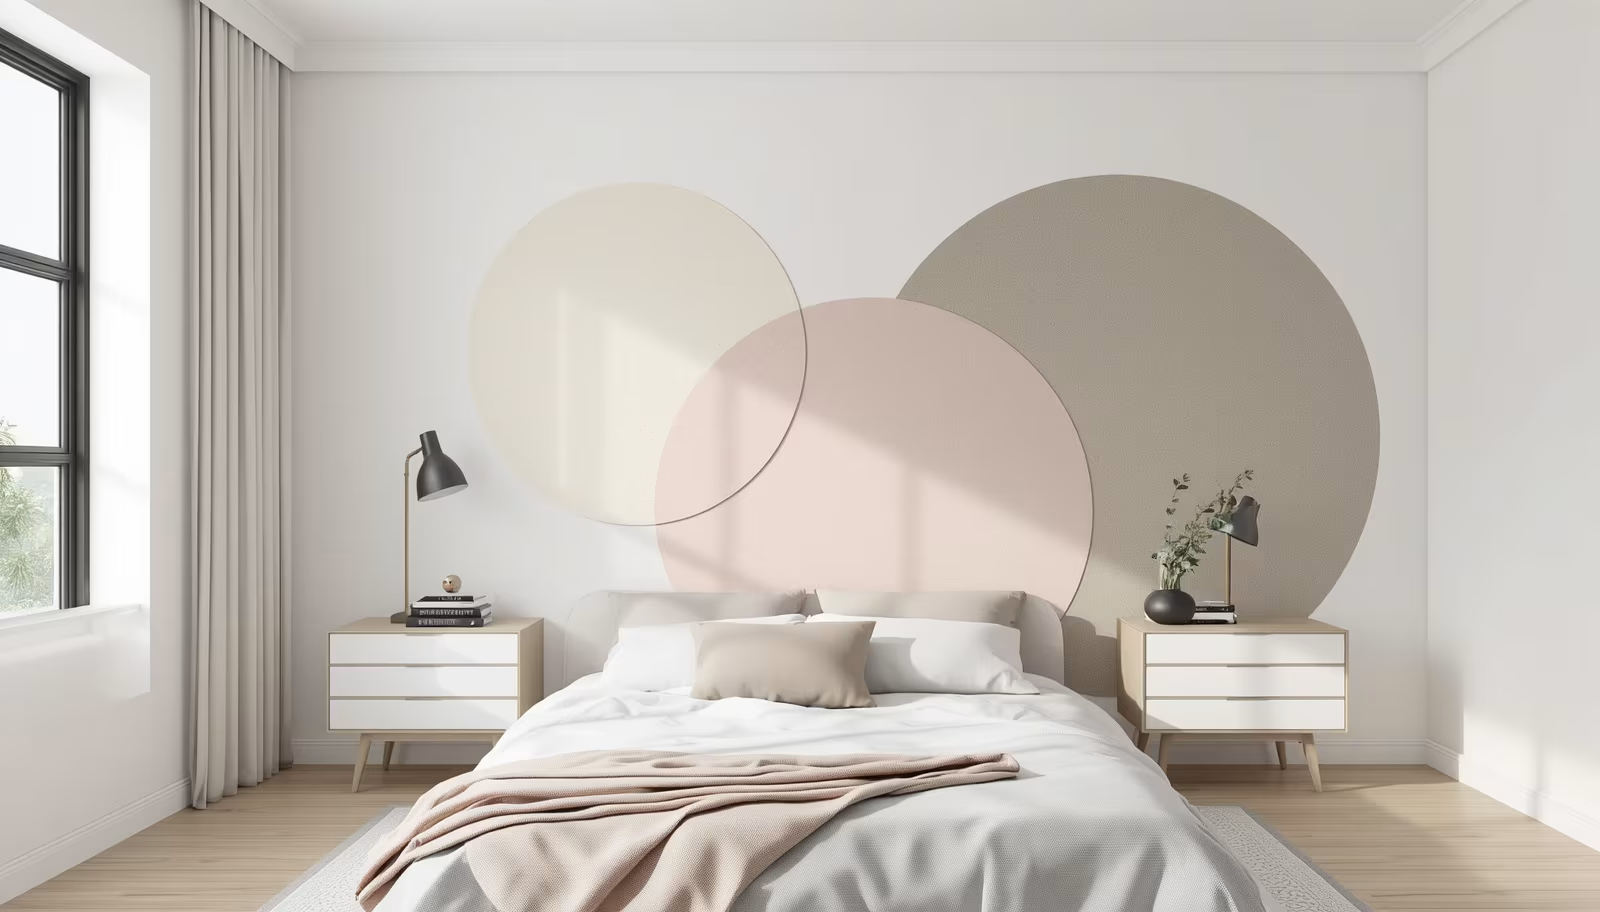
3 Oversized Interlocking Circles for Modern Bedrooms
Softening a bedroom requires moving away from rigid, sharp angles and embracing curved geometry. Interlocking circles or large semicircles introduce a mid-century modern aesthetic that feels calming yet visually sophisticated. Overlapping these rounded shapes creates third-party colors where the hues intersect, giving the illusion of translucent layers.
Drawing perfect circles on a vertical wall surface sounds difficult but relies on a very simple physical tool. You can create a makeshift compass using a piece of non-stretch string, a small finish nail, and a graphite pencil. Secure the nail at the center point of your intended circle, tie the string to the pencil, and draw your arc while keeping the line perfectly taut.
- Use a steady hand and a high-quality angled sash brush to cut in along the curved pencil lines.
- Choose low-sheen paint finishes like eggshell or matte to hide any minor imperfections in your drywall.
- Allow the first circle to dry completely for twenty-four hours before taping over it to paint the second shape.
A bedroom redesign in Portland utilized this curving style to soften a high-ceilinged loft space. The editorial team selected Farrow & Ball colors, specifically setting Setting Plaster as the dominant circular backdrop. They overlapped this shape with a smaller arc painted in De Vol Green. The intersection created a beautiful, custom color block that framed a low-profile platform bed from Pottery Barn.
4 Scandinavian Quad Blocks for Minimalist Spaces
Minimalism does not mean you are restricted to plain white walls throughout your entire home. The Scandinavian quad block layout uses four large, clean rectangles or squares positioned in a strict grid format. This approach provides a structured injection of color without introducing chaotic lines or overwhelming the architectural simplicity of a clean space.
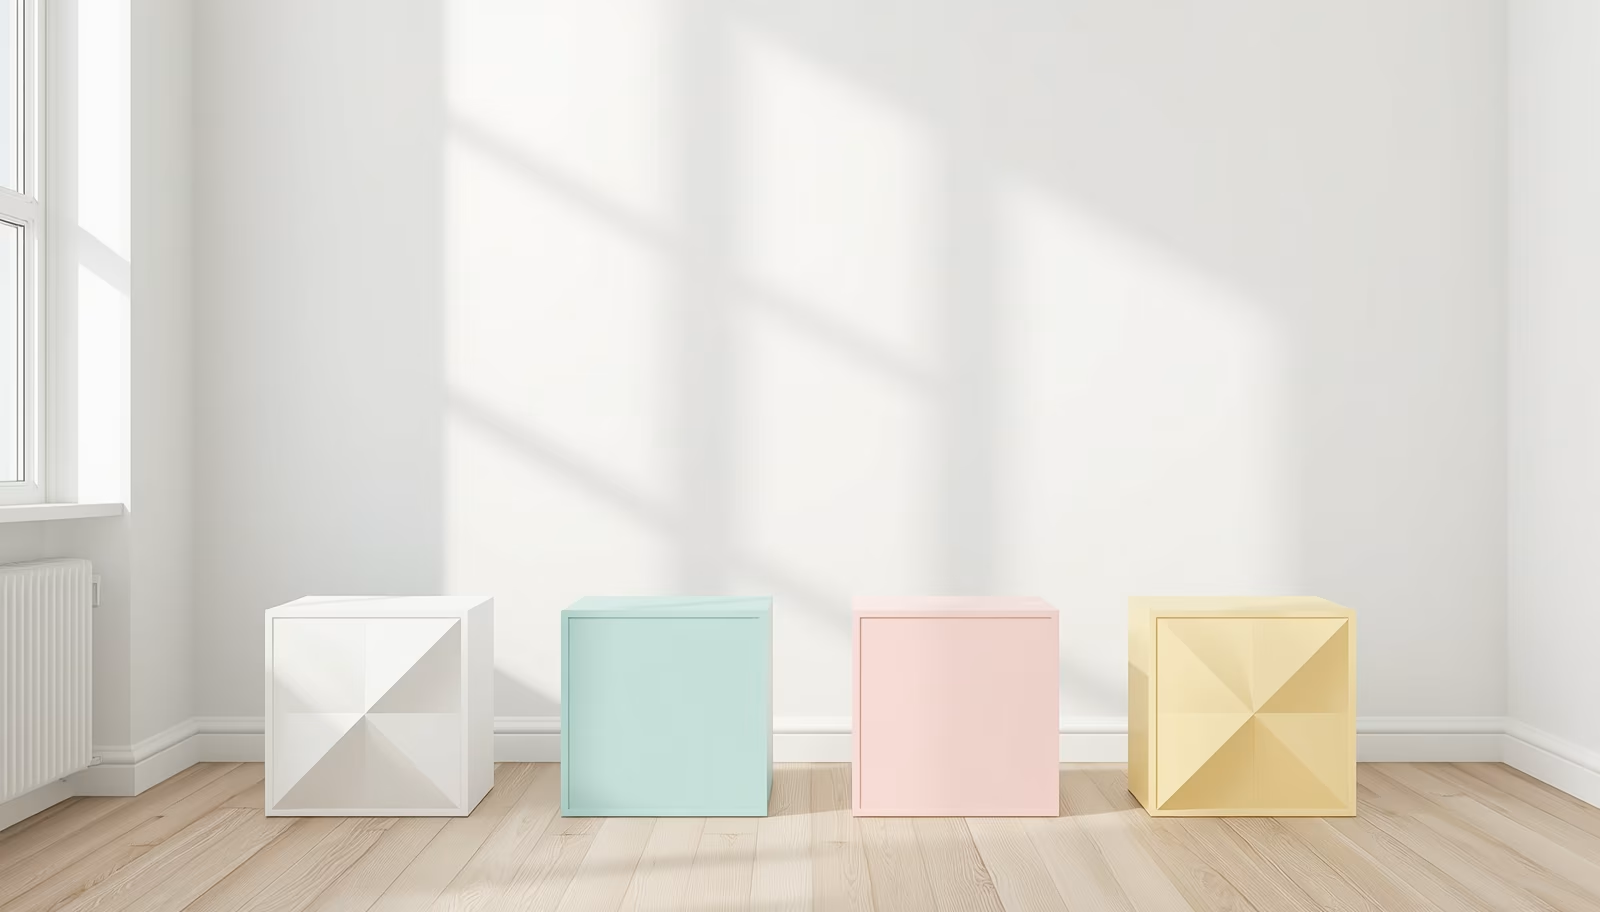
The secret to making quad blocks look intentional lies in the negative space between the painted areas. Leave a consistent three-inch border of your original wall color between each painted block. This grid of negative space acts like a matte frame on a piece of artwork, organizing the bold colors into a cohesive collection.
- Maintain perfectly straight horizontal and vertical lines by using a digital laser level during setup.
- Apply FrogTape Delicate Surface tape over newly painted areas to prevent peeling during removal.
- Stick to a muted palette of earthy ochre, slate gray, dusty rose, and pale olive green.
A minimalist apartment in Seattle used this quad system to define a dining nook within an open-concept floor plan. The owner mapped out four equal rectangles measuring forty inches by thirty inches each. They applied Behr Ultra paint in Silver Drop for the main wall, while the blocks featured varying earthy tones. The grid perfectly centered a round wooden dining table, making the eating area feel distinct.
5 Diagonal Half Wall Split for Dining Rooms
Standard chair rails have divided dining room walls horizontally for decades, but the traditional look can feel outdated. A diagonal half wall split offers a contemporary alternative that injects immediate energy into an entertaining space. By cutting the wall diagonally from one corner to another, you create a striking division that showcases your furniture.
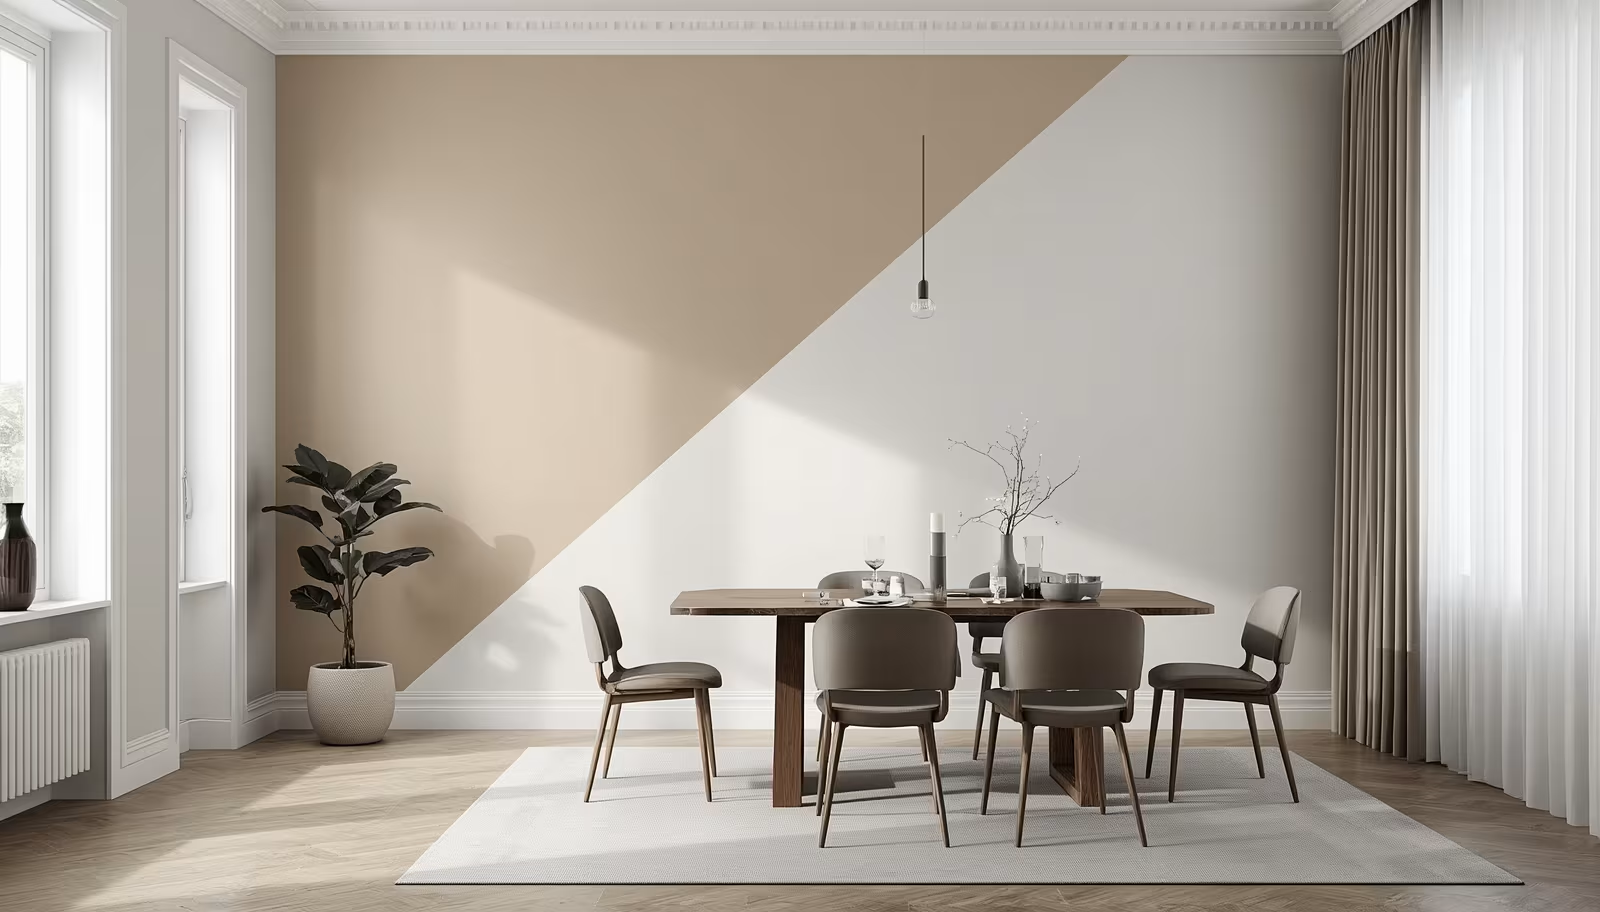
When executing a diagonal split, you must decide which direction the line will travel based on room entryways. The line should ideally rise as a visitor enters the room, pulling their gaze toward your favorite design features. Avoid splitting the wall exactly at a fifty-fifty ratio, as an offset split of sixty-forty looks far more artistic and balanced to the human eye.
- Run your tape continuously through corners without cutting it to ensure a single unbroken line.
- Paint the lower section of the wall in the darker shade to ground the room visually.
- Remove the painter tape while the second coat of paint is still slightly wet to prevent jagged edges.
A historic dining room renovation in Boston used this technique to bridge classic architecture with modern furniture styles. The designers used Magnolia Home paint, applying the deep green shade called Emmie’s Room on the lower portion of the wall. The line sliced diagonally upward above a sleek walnut dining table. The top half remained a crisp milk white, highlighting the plaster crown molding.
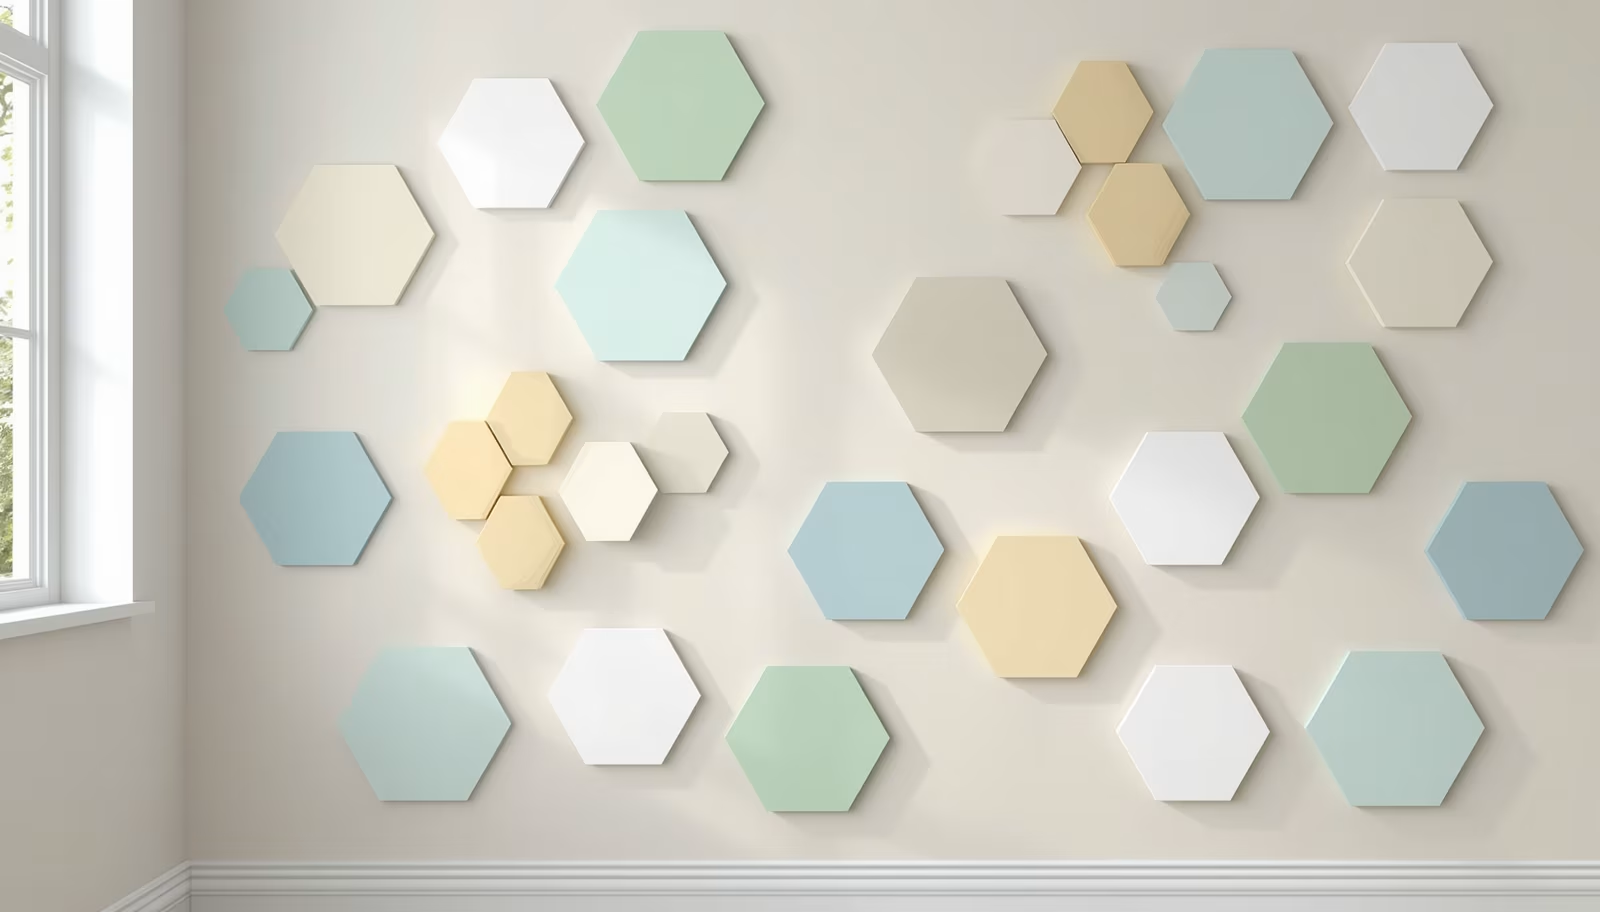
6 Honeycomb Hexagon Accent Patches for Playrooms
Hexagon patterns bring a playful, geometric energy that works exceptionally well in creative spaces or children’s playrooms. Instead of covering an entire wall from floor to ceiling, a clustered patch of hexagons looks like a modern art installation. You can start with a dense cluster near the floor and allow individual shapes to drift apart as they rise.
Creating hexagons requires patience and a cardboard or plastic template to ensure every single side matches in length. Cut a perfect hexagon out of thick matte board to use as your tracing guide across the wall surface. Any slight deviation in your measurements will multiply as you add more shapes, causing the entire pattern to look crooked.
- Create a reusable stencil from sturdy plastic backing to speed up the tracing process significantly.
- Vary the colors within the cluster using bright tones like sunny yellow, sky blue, and soft orange.
- Leave several hexagons unpainted within the center of the cluster to create an organic, floating effect.
A suburban basement playroom in Denver transformed a blank toy storage corner using this hexagon clustering technique. The parents traced nine-inch hexagons using a homemade acrylic template. They filled the shapes with Valspar paint in tones of Mustard Seed, Ocean Radiance, and Blush Pink. The colorful cluster perfectly framed a white storage system, turning a messy toy area into a design feature.
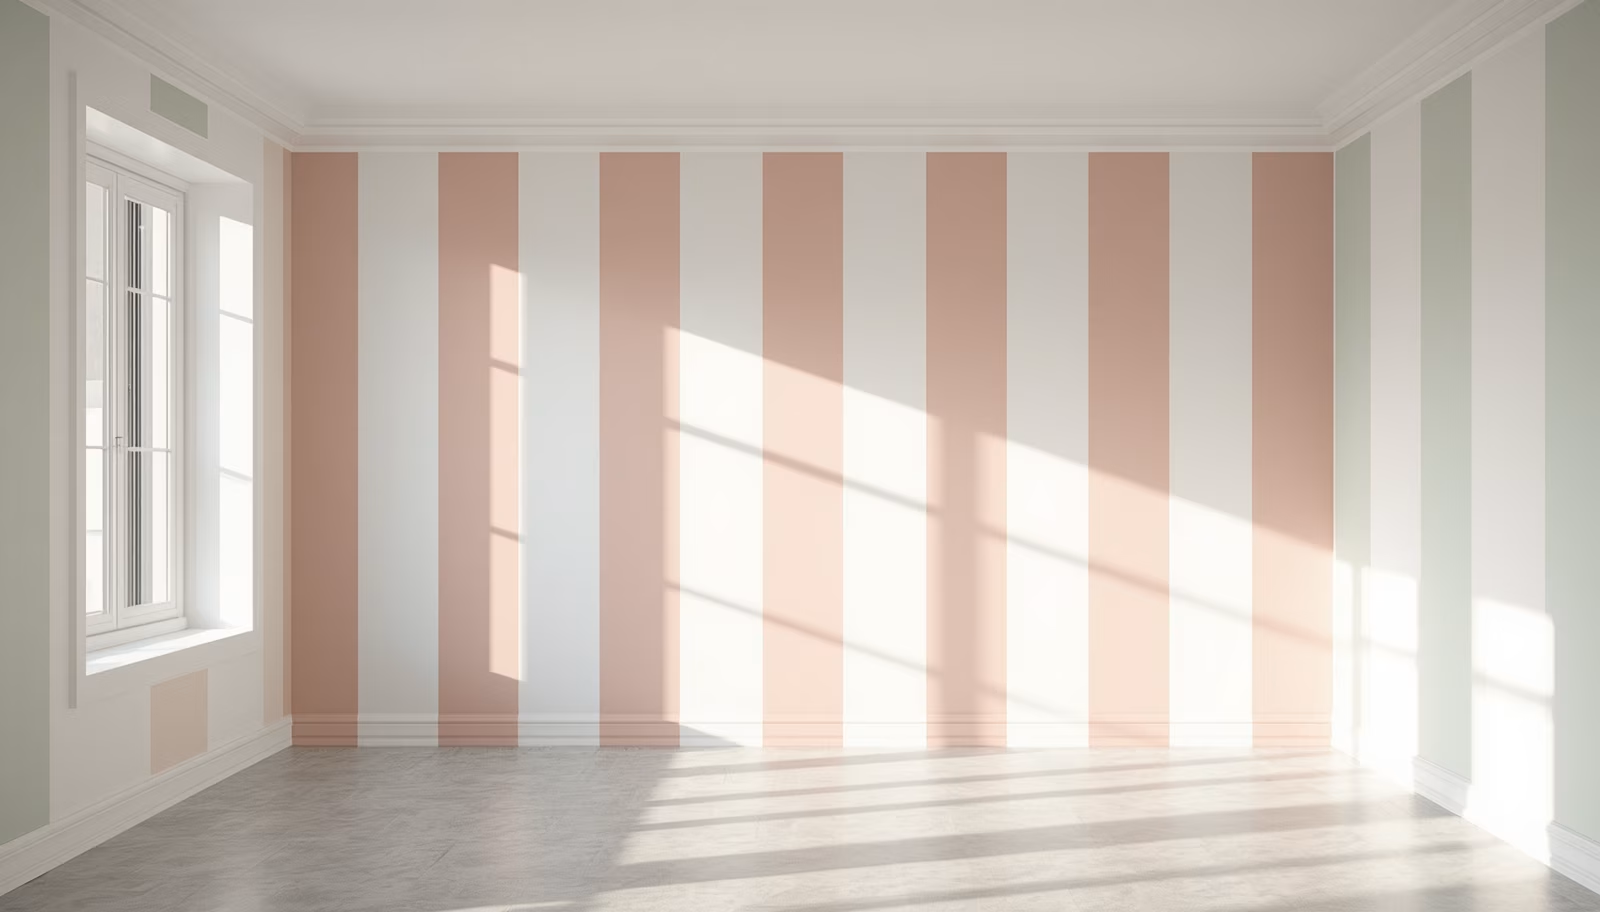
7 Vertical Sharp Pinstripes for Low Ceilings
High-contrast vertical pinstripes provide an excellent solution for rooms suffering from low, oppressive ceilings. Unlike wide stripes that can look like a carnival tent, narrow geometric pinstripes offer a sophisticated tailored appearance. This design mimics the look of high-end designer wallpaper while allowing you total control over your color choices and spacing.
The trick to painting clean pinstripes is using the correct tape width for your project. Do not use standard two-inch tape for the stripes themselves; instead, purchase half-inch detailing tape from an automotive supply store or specialty paint shop. This thin tape allows you to create razor-sharp lines that look perfectly crisp even from a close distance.
- Space your vertical pinstripes at irregular intervals to create a more sophisticated, modern rhythm.
- Choose a high-contrast pairing such as charcoal gray lines over a soft alabaster backdrop.
- Press the edges of your tape firmly with a plastic smoothing tool before applying any paint.
An entryway project in Atlanta solved a dark, cramped hallway issue by applying this vertical pinstripe method. The homeowner painted the entire hallway in PPG’s Pure White in a satin finish for maximum light reflection. They used half-inch tape to lay down vertical lines spaced twelve inches apart, filling the gaps with Black Magic. The narrow hallway immediately felt taller and more welcoming.
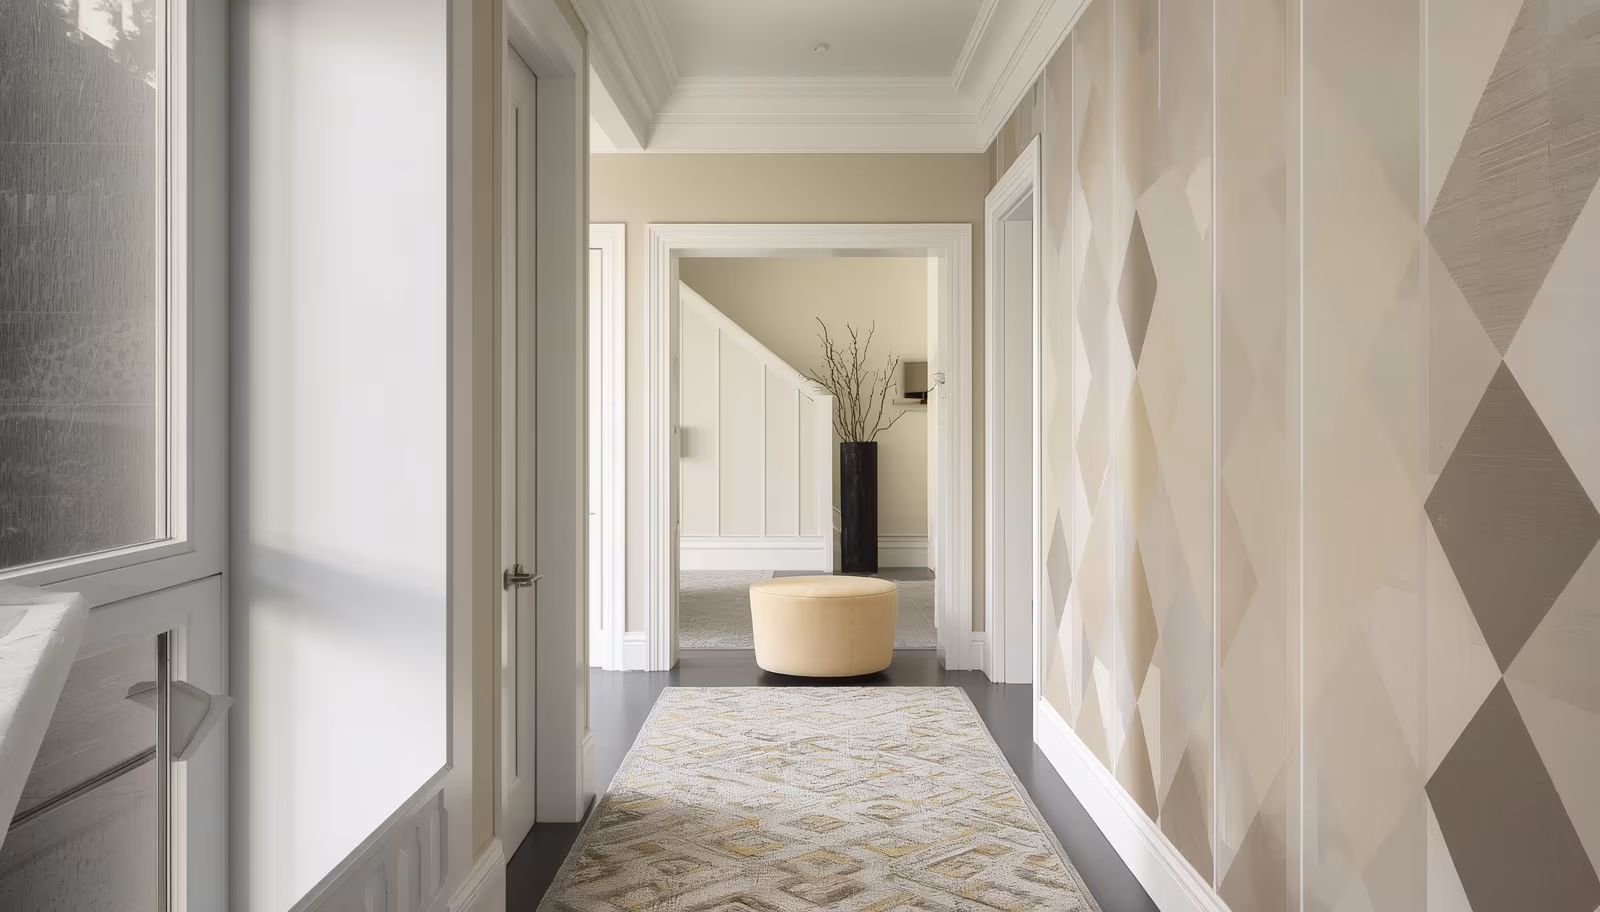
8 Diamond Argyle Matrix for Transitional Hallways
The diamond argyle matrix is a demanding geometric pattern that provides massive visual rewards when done correctly. Hallways and transitional spaces often lack architectural details, making them the perfect canvas for a full-wall pattern. The overlapping diamond shapes create an organized, diamond-lattice effect that makes plain drywall look expensive.
Mapping an argyle matrix requires precise mathematics and a long straightedge tool. You must calculate the total width of your wall and divide it evenly so that the diamonds terminate perfectly at the corners. Forgetting this step results in awkward, half-cut shapes at the edges of your wall that destroy the symmetry of the design.
- Use a chalk line to snap your diagonal grid across the wall quickly without leaving heavy pencil marks.
- Paint the background diamond shapes in a matte finish and the accent lines in a semi-gloss for texture.
- Label each diamond section with a small piece of tape marked with the color code before painting.
A transitional hallway leading to a master suite in Nashville featured a stunning blue and gray argyle matrix. The designer mapped out sixteen-inch wide diamonds across a twenty-foot long hallway wall. They used Glidden paint in basic neutrals, overlaying Slate Gray diamonds across a cool silken backdrop. The finished wall completely removed the need for hanging heavy framed artwork in the narrow passage.
Wrap Up
Executing a geometric bold wall paint design requires careful planning, accurate measuring, and the right tools. Whether you select a dramatic asymmetric triangle or a structured Scandinavian quad block, the key to success lies in your preparation work. High-quality painters tape, a reliable level, and patience during tape removal ensure clean lines every single time. Take your time during the layout phase and watch your living space transform through the power of simple geometry.
FAQs Section
How do I stop paint from bleeding under the painters tape?
To prevent paint from bleeding, paint over the edge of your applied tape using your wall’s base color first. This seals the tape edge with the existing color, ensuring that your new bold accent color cannot seep underneath.
What paint finish is best for geometric wall designs?
An eggshell or matte finish is ideal for geometric designs because flat surfaces do not reflect light unevenly. High-gloss finishes highlight every small drywall imperfection and make your taped lines look distorted from different angles.
How long should I wait before removing the tape from the wall?
You should pull the painters tape away from the wall while your final coat of paint is still slightly damp. Pulling the tape at a strict forty-five-degree angle while wet prevents the dried paint film from tearing away from the surface.
Disclaimer
This content shared by Fall Rugs is solely for research and informational purposes. Fall Rugs is not a professional interior design or home renovation consultancy, and the information provided should not be considered professional advice for home improvement or decor. All ideas and suggestions are based on current trends and general knowledge in the home decor industry.