TL;DR
Tile drenching means committing to a dominant color family across walls, floors, and fixtures to produce depth through texture, scale, and finish. Success hinges on measured contrast in grout, thoughtful tile orientation, and real-world sequencing during installation.
Introduction
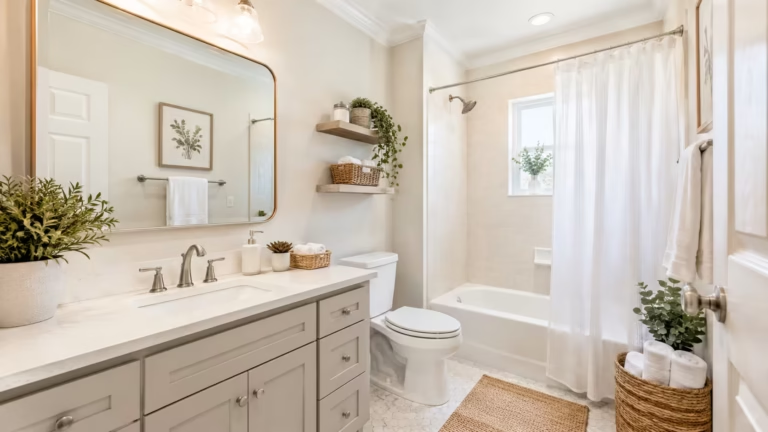
Have you noticed bathrooms that read like a single continuous surface rather than a collection of finishes? That effect is tile drenching. This approach makes small baths feel larger and complex spaces feel deliberate. The following explains how professionals pick tones, match grout, manage transitions, and avoid common mistakes installers and designers keep repeating.
Why tile drenching works
Tile drenching uses limited color range so the eye moves across surfaces without interruption. Human vision perceives uniform fields as larger, which is why designers use tonal repetition to expand perceived space. Texture and finish supply the contrast where color does not, so matte porcelain, honed stone, and glossy glass tiles play different visual roles even when they share a base hue.
True mastery separates surface finish from material class. For example, a matte ceramic on shower walls next to a lightly polished limestone floor reads as deliberate because reflectivity differs. I once recommended identical-seeming greige tiles for a client in Karachi; removing a glossy accent strip during mockup prevented a shallow, banded effect.
Choosing the tonal range
Start with a dominant base hue then select two supporting subtones: one slightly lighter, one slightly darker. This three-point system prevents visual flatness while keeping the palette restrained. Neutral bases such as warm greys, earthy greens, and soft blues give flexibility with brass, black, or nickel hardware.
When specifying, bring physical samples into the bathroom at different times of day. Artificial light and window direction alter perceived warmth. On a contract in Lahore, an ostensibly neutral taupe tile shifted pink under warm downlights; swapping to a cooler taupe fixed the clash without changing grout or fixtures.
Tile formats and scale choices
Large-format tiles reduce grout lines, reinforcing the drench; they work well on walls and floors when substrate tolerances allow. Smaller mosaics still have a place as accent surfaces within the same tone family, particularly in niches or shower floors where slip resistance matters.
Mixing scale requires an organizing rule. Keep one dominant field—usually wall or floor—in the largest format, then use smaller formats for functional zones. In a recent renovation, I used 600x1200mm porcelain on walls and 100x100mm textured tiles in the shower curb; the scale shift read as intentional, not busy.
When large-format tiles fail
Large tiles demand flatter substrates. I saw installers cut corners on backer board, producing lippage and shadow lines that ruined the drench. The lesson: if the subfloor or wall is uneven, choose rectified smaller tiles or plan for self-leveling compound. Budgeting for proper substrate prep prevents a false economy.
Grout as a tonal and structural tool
Grout color can either disappear or define edges. For tile drenching, grout that closely matches tile hue creates continuous planes. Slightly darker grout can ground a floor and hide dirt; slightly lighter grout brightens walls. Avoid stark white grout unless deliberate—the contrast breaks the drench.
Use grout width to calibrate rhythm. Narrow joints suit modern, seamless looks; wider joints add texture and scale. For a wet-room client, switching from 2 mm to 4 mm grout reduced visible imperfections and preserved the unified color story. Seal grout where needed, especially with natural stone.
Grout failures I fixed
A project in Karachi used off-white grout with warm beige tiles; within months, the grout looked cold and patchy. Regrouting with a warm, sand-toned polymer-modified grout restored cohesion. That experience changed how I present color chips and grout mockups to clients: always show installed edge samples, not just stacked tiles.
Texture, finish, and light interaction
If color is constrained, texture must carry the narrative. Honed stone absorbs light; polished stone reflects it. Textured porcelain creates shadow and tactility. Place higher-reflectance surfaces where you want visual focus and matte textures where you want calm.
Consider artificial lighting temperature and placement. Downlights emphasize texture differently than wall washers. On a hotel bathroom job, swapping recessed downlights for linear wall-mounted fixtures revealed the honed tiles’ subtle veins instead of flattening them, which amplified the drench effect.
Transition techniques between surfaces
Transitions break or continue the drench. A flush transition, where wall tile continues to the floor, maintains continuity but requires careful waterproofing and slope planning. A reveal profile or slender metal trim creates a controlled break while staying within the same color family.
Plan transitions at thresholds. Tile-to-tile transitions inside the same palette can be handled with matching bullnose or mitered edges. For tile-to-wood thresholds, choose metal profiles in matching finishes; brass reads warmer, anodized aluminum reads cooler. A condominium renovation I oversaw used a low-profile bronze trim between bathroom tiles and engineered wood, which preserved the monochrome mood without a visible jolt.
Fixtures, fittings, and hardware choices
Fixtures must speak the same tonal language. White sanitaryware often reads crisp against warm drench palettes and pulls attention. Colored basins or freestanding tubs in the same family deepen the effect but commit you to stronger maintenance routines.
Hardware finish choices alter perceived temperature. Polished chrome cools down warm tiles; brushed brass warms cool palettes. In a residential job, choosing matte black fixtures with soft grey tiles added a graphic edge that read modern without fragmenting the monochrome field.
Practical installation sequencing
Order materials with buffers: tiles, grout, trims, and backer boards all need matching lots. Coordinate delivery so installers can lay wall tiles before floor tiles when possible; gravity, water management, and scaffolding access favour this sequence. For shower installations, waterproofing membrane must precede tile backer and be tested before tiling.
I once halted a job because the on-site tiles arrived two shades different from the approved sample. Holding the installer and supplier accountable saved the client from visible banding. Always document batch numbers and place a signed mockup on site.
Maintenance and longevity considerations
Monochrome surfaces show different wear patterns depending on finish. Glossy surfaces reveal water spots and scratches; matte surfaces mask them but can show oilier marks. Choose sealants and cleaning agents matched to material: stone often needs penetrating sealers, porcelain benefits from pH-neutral cleansers.
Educate clients on what will age and how. A homeowner in Karachi accepted a slightly higher maintenance routine for a honed limestone look because they wanted the tactile warmth; agreeing upfront avoided later disappointment.
Common mistakes and how to avoid them
A frequent mistake is relying solely on color swatches without full-scale mockups. Another is underestimating light. Installers sometimes forget to coordinate grout sample approval and grout width, creating unintended contrast. Overuse of glossy accents breaks the drench. Every error I list has a countermeasure: mockups, staged lighting checks, batch verification, and disciplined finish selection.
On one rooftop project, designers selected the right tile but paired it with mismatched sealant and grout sheen. The apparent mismatch could not be corrected without regrouting. The extra cost taught the team to include grout sheen in purchase orders.
Two real-world scenarios
Scenario one: A 4.5-square-meter ensuite in a Karachi apartment used a cool grey porcelain across walls and floors, matching grout within a single shade, and a matte black rain shower. The visual result felt larger, though the room was unchanged physically. The client later requested a warmer brass towel rail, which we introduced in a darker finish to avoid breaking the tonal flow.
Scenario two: A boutique spa in Lahore wanted a calming green drench. We used three formats: 300×900 wall tiles, 600×600 floor tiles, and 25×25 mosaic shower floors in the same hue but with textured finishes. Initial lighting tests revealed the mosaic read too dark, so we swapped to a slightly glossier mosaic to balance reflectivity and maintain the drench.
When drenching should not be used
Tile drenching is not the answer for every brief. If the architecture demands strong contrast, or if future resale requires neutral predictability, restrained accents may be safer. Highly patterned tiles with existing strong architectural features will compete rather than cooperate with drenching. I declined a project where original Victorian tiling needed highlighting rather than masking; tonal unification would have erased valuable character.
Wrap Up
Tile drenching is a commitment that rewards careful selection of tone, texture, and installation rigor. The technique creates coherence through restrained color and deliberate differences in finish and scale. With proper mockups, grout decisions, and sequencing, a drench can make small bathrooms feel generous and complex bathrooms quietly refined.
FAQs Section
Q: What is tile drenching in bathroom design?
A: Tile drenching is the intentional use of a single color family across multiple surfaces to produce a continuous, layered look where texture and scale provide contrast.
Q: How should I choose grout for a monochrome bathroom?
A: Match grout hue closely to the tile to maintain continuity; choose joint width and grout sheen to manage rhythm and maintenance needs.
Q: Are large-format tiles necessary for a drench?
A: Large-format tiles strengthen the continuous effect but require flat substrates; smaller tiles can work if used selectively for texture or functional areas.
Disclaimer
This content shared by Fall Rugs is solely for research and informational purposes. Fall Rugs is not a professional interior design or home renovation consultancy, and the information provided should not be considered professional advice for home improvement or decor. All ideas and suggestions are based on current trends and general knowledge in the home decor industry.