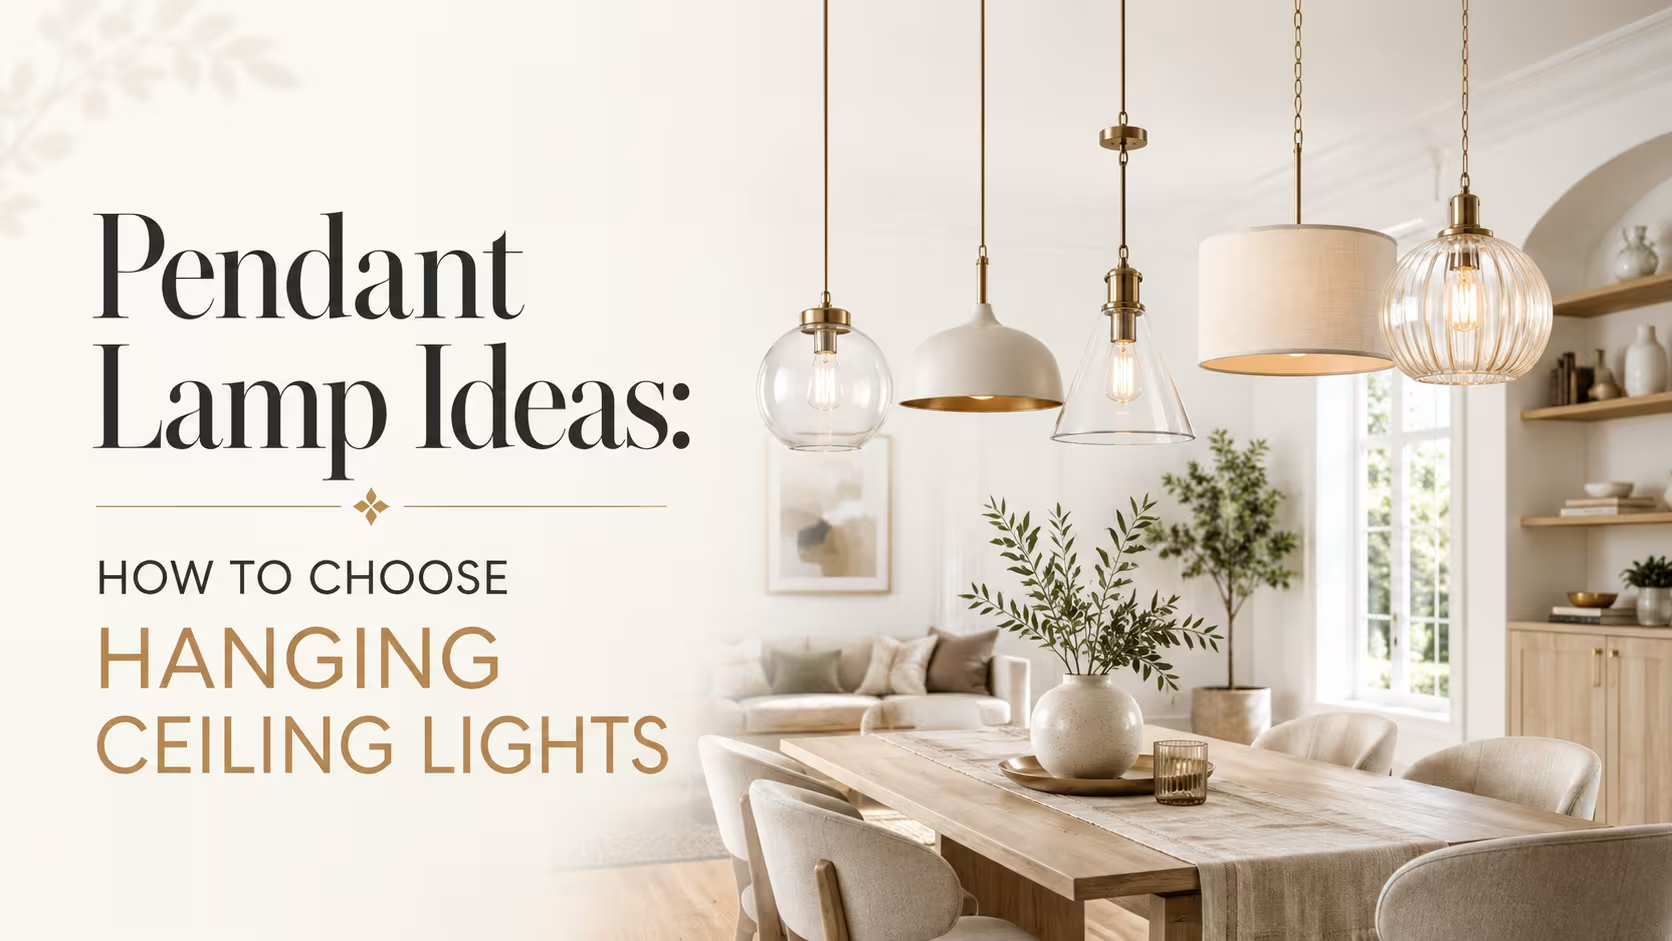
TL;DR
Perfecting residential illumination requires balancing visual scale, fixture height, and specific bulb functionality across different living spaces. Selecting the right hanging ceiling lights relies on matching material opacity with the primary task of the room. True success comes from matching the aesthetic design of a fixture with the specific light distribution pattern your space needs.
Introduction
Does your home lighting feel flat, inefficient, or uninspiring? Standard flush mounts often flood a room with sterile, uniform brightness that washes out architectural details and dampens the mood. Incorporating targeted overhead fixtures introduces depth, character, and functional zoning to your living spaces. This comprehensive guide breaks down downlighting mechanics, scale ratios, and placement strategies to help you select the ideal illumination for every room.
The Architecture of Downward Illumination
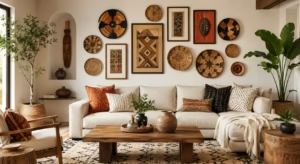
Residential design relies heavily on layering light to create depth, comfort, and functionality. Hanging fixtures serve as the focal point of this approach, anchoring furniture arrangements and defining clear zones within open-concept layouts. When you suspend a light source from the ceiling, you change how brightness moves through the space, shifting from a generic overhead glow to a purposeful, directed stream. This technique allows you to highlight specific textures, enhance color palettes, and draw attention to premium architectural features.
Understanding Lumens and Diffusion
Achieving balance requires looking beyond the exterior design of a fixture to examine how light interacts with its surroundings. Clear glass globes offer brilliant, unfiltered illumination perfect for general visibility, though they require low-wattage filament bulbs to prevent uncomfortable glare. Frosted or opal glass diffuses the output, scattering rays evenly to minimize harsh shadows and soothe the eyes. Metal or ceramic shades completely block side output, channeling the entire luminous force downward to create an intense, focused beam for specific tasks.
Selecting the Proper Bulb Technology
The interaction between your fixture design and bulb selection dictates the final atmosphere of your room. Modern light-emitting diodes offer precise control over color temperature, which professionals measure using the Kelvin scale. A warm rating around 2700K mimics classical incandescent filaments, making it perfect for cozy lounge areas and restful bedrooms. Work-heavy zones like food preparation stations or home utilities demand a crisper, neutral profile around 3000K to improve visibility and reduce eye strain during detailed tasks.
Elevating Kitchen Islands with Task Fixtures
Culinary workstations require bright, focused visibility to ensure safe food preparation and clean presentation. Hanging installations over a central island turn a utilitarian workspace into an inviting social hub for family and guests. The primary challenge lies in arranging multiple sources to prevent overlapping shadows while keeping sightlines clear across the room. Designers often struggle with the choice between a single large statement piece or a aligned row of smaller matching units.
Linear Spacing and Proportion Rules
Spacing mistakes can quickly ruin an otherwise beautiful kitchen design. A reliable industry standard is to position fixtures roughly thirty inches apart, measuring from the center of each canopy to the next. Keeping a clear distance of twelve inches from the outer edge of the counter ensures the light stays contained and prevents accidental bumps. For standard three-foot-high counters, hanging the bottom rim of the shade thirty to thirty-six inches above the surface offers an ideal balance of light spread and clear sightlines.
Material Choices for High-Utility Zones
Kitchen environments expose hanging fixtures to airborne oils, moisture, and heat on a daily basis. Choosing porous materials like woven rattan or delicate fabrics often leads to premature staining and difficult maintenance routines. Selecting non-porous materials like brushed stainless steel, industrial aluminum, or thick powder-coated metals ensures your fixtures are easy to wipe clean. Glass shades offer excellent transparency but require regular cleaning to remove the thin film of grease that naturally settles in active kitchens.
Creating Ambience in Dining and Living Spaces
Lounge environments and dining areas require flexible, soft lighting that can easily transition from daytime activities to intimate evening gatherings. Heavy, direct downlighting can cast deep shadows on faces, making spaces feel uninviting and clinical. Introducing softer, ambient fixtures helps soften these harsh angles, encouraging relaxation and comfortable conversation. The goal shifted from bright, task-focused visibility to creating a warm, welcoming glow that brings people together.
Setting Table Clearances and Scale
A common mistake in dining areas is hanging a beautiful fixture too high, which disconnects the light from the table below and causes uncomfortable glare for seated guests. Lowering the fixture to sit thirty to thirty-four inches above the tabletop creates an intimate, framed dining setting. The total width of the shade should remain roughly twelve inches narrower than the table width to prevent visual crowding. This proportion keeps the dining area feeling open and balanced while ensuring the table receives full, even light coverage.
Managing Visual Weight in Large Rooms
Great rooms with high ceilings often swallow up standard light fixtures, making them look small and out of place. High-volume spaces need fixtures with significant visual weight, such as multi-tiered setups, wide woven domes, or clustered geometric groupings. Matte black iron frames, antiqued brass rods, and thick smoked glass help anchor open spaces without blocking natural light. Combining these hanging elements with recessed cans and wall sconces creates a rich, layered lighting system that adapts to any time of day.
Enhancing Bedside Comfort with Low-Level Hanging Lights
Swapping traditional bedside table lamps for suspended ceiling fixtures frees up valuable surface space on nightstands while creating a distinct, modern look. This setup allows you to position your reading light at the perfect height, removing the clutter of cords and bulky lamp bases. The design shift creates a clean, minimalist aesthetic that works beautifully in compact urban apartments and spacious main suites alike. It transforms the bed into a clear focal point, framing the headboard with balanced symmetry.
Finding the Perfect Nightstand Height
Bedside installations require precise positioning to prevent blinding glare when you are resting in bed. Hanging the bottom of the shade twenty to twenty-four inches above the top of the nightstand aligns the light perfectly for reading while keeping the bulb hidden from direct view. Incorporating dedicated wall switches right above the headboard lets you control the lighting without having to get out of bed. Soft fabric drums or perforated metal shades work best here, casting a gentle, relaxed glow that helps you unwind.
Creating Balanced Asymmetrical Layouts
While matching pairs on both sides of the bed offer classic symmetry, asymmetrical lighting layouts can bring fresh energy to modern bedrooms. Hanging a single, eye-catching sculptural piece on one side balances a flexible, adjustable wall reading light on the other. This approach works exceptionally well in rooms with off-center windows or unique architectural layouts. The key to making this style work is keeping the color tones and materials consistent across all the fixtures so the room still feels cohesive.
Maximizing Style in Entryways and Narrow Hallways
First impressions matter, and the entry hall sets the design tone for the rest of your home. Hallways and entryways are often narrow and lack natural windows, making thoughtful light placement essential for creating a welcoming feel. A well-positioned hanging light guides guests into your home, drawing their eyes upward to make tight spaces feel larger. This simple addition turns a basic pass-through hallway into a beautiful architectural transition.
Calculating Safe Headroom Clearance
Safety must come first when installing hanging lights in high-traffic hallways and main entryways. Standard building practices require keeping at least seven feet of open space between the floor and the bottom of the light fixture so tall guests can walk underneath safely. If you have a grand two-story entryway, hanging the fixture level with the second-story windows creates a balanced look from both inside and outside the house. This placement fills the high vertical space beautifully, making the entry feel grand and well-proportioned.
Brightening Long, Narrow Hallways
A single light fixture in a long hallway often leaves the far ends in dark shadows, creating an unwelcoming tunnel effect. Spacing smaller, matching hanging lights eight to ten feet apart down the length of the hall creates a smooth, continuous flow of light. Choosing semi-translucent or frosted glass globes ensures the light spreads sideways against the walls, making narrow corridors feel wider and more open. This repetitive layout adds a pleasing sense of rhythm and architectural structure to plain hallways.
Designing Functional and Stylish Bathroom Layouts
Bathrooms require bright, highly accurate lighting for morning grooming routines, but they also need soft options for relaxing evening baths. Hanging fixtures bring elegant style to these practical spaces, breaking up the standard look of flat mirrors and heavy tiling. However, the combination of high humidity and close water sources requires careful fixture selection and strategic placement. Balancing style with safety rules ensures your bathroom lighting is both beautiful and long-lasting.
Navigating Safety Zones and Moisture Levels
Water and electricity require strict boundaries to ensure safety in damp environments like bathrooms. National electrical codes require keeping hanging fixtures at least three feet away from the outer edges of bathtubs and shower stalls. Any light placed within this moisture zone must carry an official damp-location or wet-location safety rating. Opting for sealed brass structures, stainless steel components, and closed glass globes protects internal wiring from rust and short circuits over time.
Balancing Vanity Mirrors for Clear Visibility
Hanging lights over a bathroom vanity should supplement your main mirror lights rather than serve as the only light source. Placing a fixture directly above your head can cast deep shadows under your eyes and chin, making grooming tasks difficult. Hanging a pair of slim, elongated fixtures on either side of the mirror spreads light evenly across your face, eliminating harsh shadows. This setup provides excellent visibility for morning routines while adding a touch of sophisticated style to your vanity area.
Wrap Up
Mastering home lighting requires a thoughtful blend of accurate measurements, appropriate materials, and a clear understanding of how light spreads through a room. Matching the right shade style and bulb brightness to the specific activities in each space lets you easily balance style and functionality. Investing time into planning your light placement and hanging heights creates a cohesive, inviting atmosphere throughout your home. Well-planned lighting does more than simply clear away the shadows; it completely reshapes how you experience your living space every day.
FAQs Section
How low should a hanging light sit above a standard kitchen island surface?
The bottom edge of the light fixture should sit thirty to thirty-six inches above the countertop surface. This height keeps your sightlines clear across the room while providing excellent, focused light for food preparation.
Can I install hanging ceiling lights in a home with standard eight-foot ceilings?
Yes, hanging lights work beautifully with eight-foot ceilings when placed over furniture like dining tables, kitchen islands, or bedside nightstands. In open walking areas, maintain at least seven feet of clearance from the floor to keep the space safe and comfortable to walk through.
What is the best way to choose between a single large light fixture or multiple smaller ones?
A single large fixture creates a strong focal point over round tables or compact seating areas. Multiple smaller fixtures arranged in a row work best for long, linear spaces like kitchen islands or extended hallways, providing balanced light coverage across the entire surface.
Disclaimer
This content shared by Fall Rugs is solely for research and informational purposes. Fall Rugs is not a professional interior design or home renovation consultancy, and the information provided should not be considered professional advice for home improvement or decor. All ideas and suggestions are based on current trends and general knowledge in the home decor industry.